Human Resources > Workforce Administration > Search > Employee > Personal
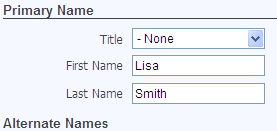
This section contains an employee's primary name and any alternate names that need to be stored. Employee searches use primary and alternate names and any names stored in history.
Use the Create Event button, located on the left side of the section header, to record a name for the first time or edit a name that already has been included in the payroll process but needs an alias for W-2 or 1099 processing or has been changed due to marriage, divorce or other event.
The original name remains in the system, and the new name becomes current.
Note: In essence, the Create Event button creates a new effective-dated entry, allowing the history of the entry to be tracked.
If you are recording a name for the first time, fields for all elements of the name are available for entry. If you are recording a name change for someone who already has been included in the payroll process, the current entries are available for editing.
If you do not want to save your entries, click Cancel. If you are satisfied with your entries, click Save. The Name section updates, and the new effective date of the name displays in the top-left corner of the section, immediately below the section header.
To edit a typographical error or other minor error in a name that already has been saved, click the Edit button, located on the left side of the section header. The name fields become visible, with borders highlighted, and their entries are available for editing. ![]() Show me.
Show me.
The difference between the Create Event and Edit buttons.
Note: When the name fields are in an editable state, Save and Cancel buttons take the place of the original buttons in the section header.
After making your change(s), click Save.
To delete a name, click the Delete Event button, located on the left side of the section header. A dialog prompts you to confirm the delete.
If multiple events have resulted in name changes, you may view the other names and their effective dates by clicking the left and right arrows of the navigation control located on the right side of the section header. ![]() Show me.
Show me.

Note: The effective dating of names makes it possible to run reports that show all name changes that occurred within a selected time period.
The following table contains descriptions of the fields in the Name section:
| Field | Description |
|---|---|
| Effective Date | Date the name takes effect. This field may contain a future date, should an employee want to notify the company of a name change before it occurs, or a past date, even if a payroll has been posted using the original name. |
| Primary Name | |
| Title | Title preceding the employee's surname or full name, if applicable. Examples may include Dr., Ms., Rev. You may click directly in the field to select from a drop-down list of valid titles. |
| First Name | Required. Primary name the employee goes by; for example, if Charles Jacob Smith goes by C.J. Smith, type C.J. in the First Name field and Smith in the Last Name field.
|
| Last Name | |
| Middle Name | Optional. Employee's middle name. |
| Suffix | Employee's name suffix, such as Sr. or Jr., if applicable. You may click directly in the field to select from a drop-down list of valid suffixes. |
| Alternate Names | |
| Paycheck Name | Name printed on the employee's paychecks. These fields also may be used if checks need to be written to an estate. |
| W-2 Name |
Name that printed on the employee's W-2 or 1099, usually the name that appears on the social security card. These fields also may be used if W-2s or 1099s need to be sent to an estate. On a W-2 or 1099 form, entries in these fields override entries in the corresponding Primary Name fields; for example, if an employee's primary name is Charles J Smith and the middle name in W-2 Name is entered as Jacob, the name would appear on a W-2 form as Charles Jacob Smith. |
|
User-Defined Fields User-defined name fields, set up at Maintenance > new world ERP Suite > Security > User-Defined Fields, display in the bottom portion of the Name section. Use these fields to maintain data not already included in the section. |
|
Once you are satisfied with your entries in the Name section, click Save.