Including Budget Instructions in Budget Accounts and the Budget Worksheet
Enhancements have been made to allow authorized users to include budget instructions in budget accounts and on the Budget Worksheet.
This is done by 1) creating a new user defined field (UDF) labeled Budget Instructions for the Budget Accounts record type, 2) securing the UDF so that only authorized users can edit it, 3) adding budget instructions to a budget account, 4) including the UDF in the Budget Worksheet standard report, and finally 5) setting up the Budget Instructions UDF to carry forward year after year.
Refer to the following sections:
- Create a UDF for Budget Instructions
- Add Security to the Budget Instructions UDF
- Add Budget Instructions to a Budget Account
- Include UDFs on the Budget Worksheet Standard Report
- Set Up the Budget Instructions UDF to Carry Forward From Year to Year
Create a UDF for Budget Instructions
Budget instructions can now be included in budget accounts, and on the budget worksheet, by way of a user defined field. This section describes how to create the UDF and define the field’s basic attributes.
- Go to User-Defined Fields Maintenance: Maintenance > new world ERP > Security > User-Defined Fields.
-
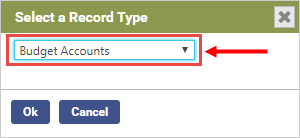
The Select a Record Type pop-up window will open automatically. Select the Budget Accounts record type from the drop-down list, and then click Ok.
-
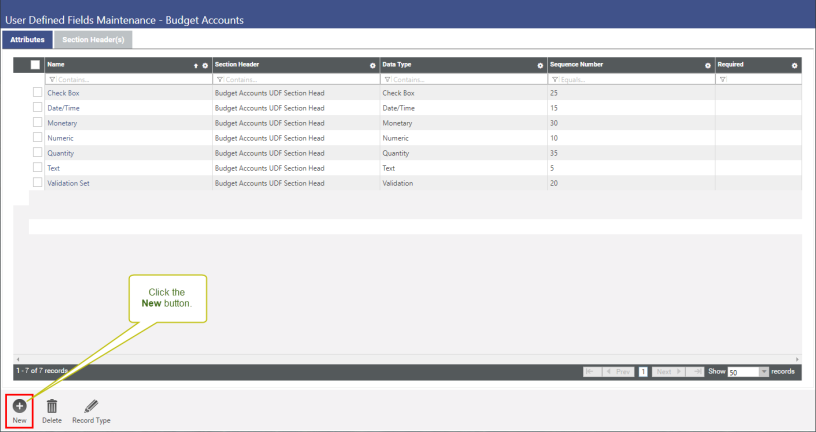
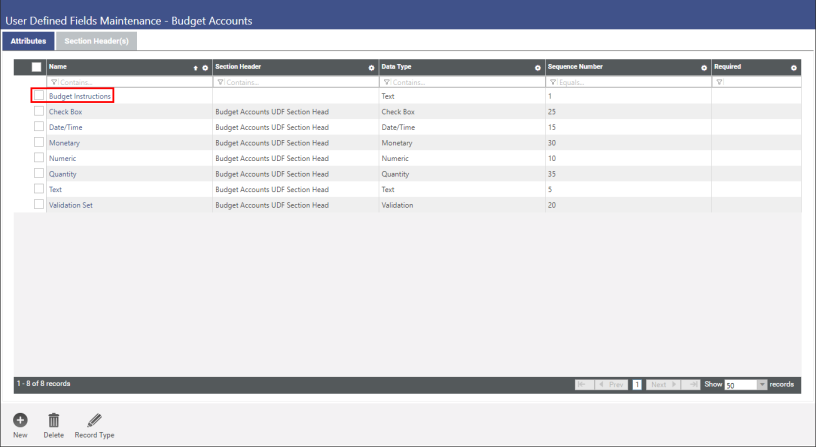
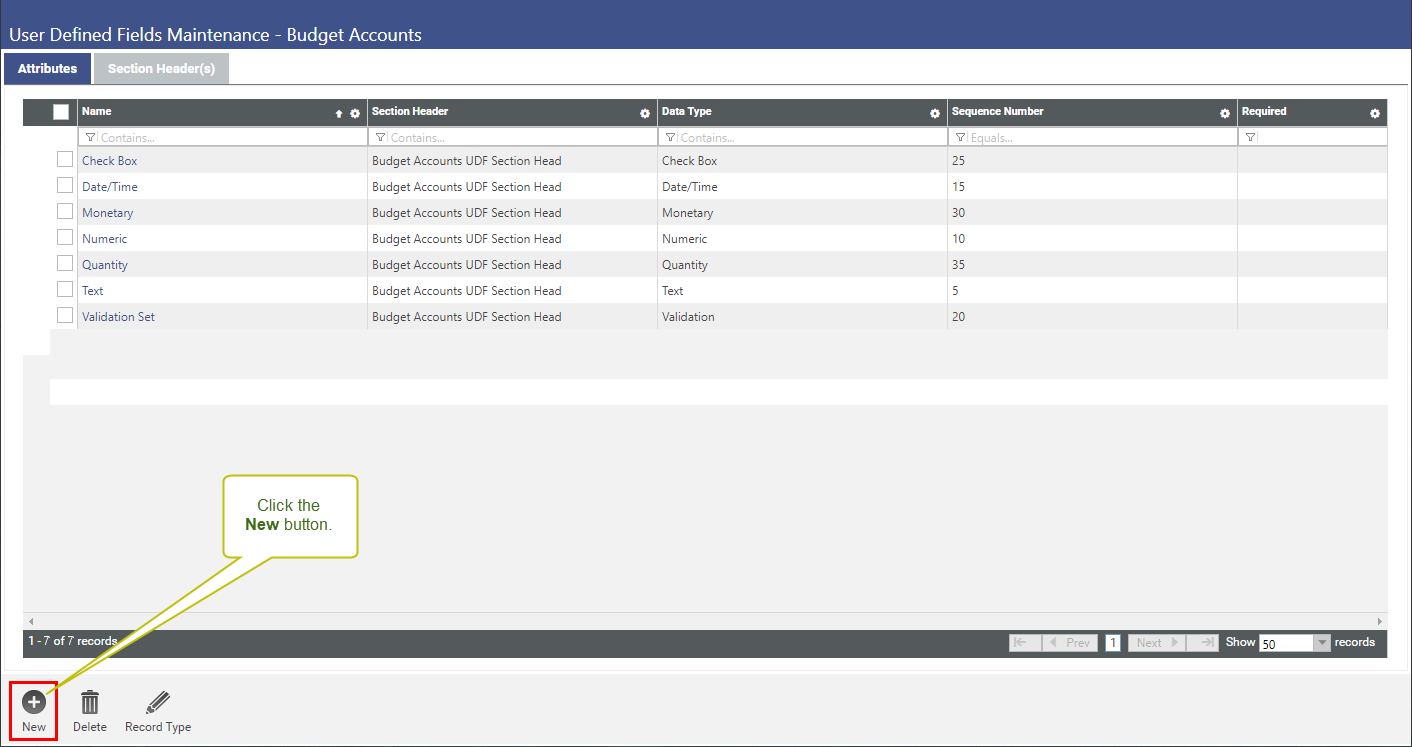
The User Defined Fields Maintenance - Budget Accounts page will open. This is the maintenance page for all user defined fields available to the budget accounts record type. Here we will create a new field called Budget Instructions.
Click New.
-
The Add User-Defined Field Attribute window will open. This window allows you to define the key attributes of your new user defined field.
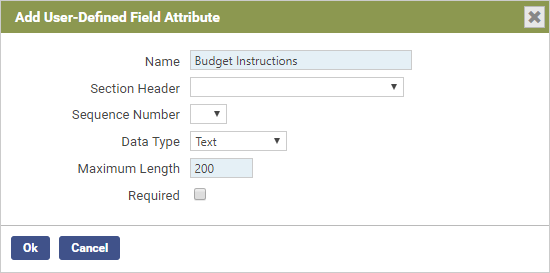
- In the Name field, type Budget Instructions.
- Select Text from the Data Type drop-down list.
- In the Maximum Length field, type the maximum number of characters this user defined field will accommodate.
- Click Ok.
-
The User Defined Fields Maintenance - Budget Accounts page will refresh to include the newly created Budget Instructions user defined field.

Add Security to the Budget Instructions UDF
Now that the Budget Instructions UDF has been created, you can secure the Budget Instructions UDF so that only authorized personnel can change the field contents, i.e., the budget instructions, that you will enter in the UDF. Security is applied via the Field-Level Security page and User Permissions.
- First, open the Field-Level Security page: Maintenance > new world ERP Suite > Security > Field level security.
-
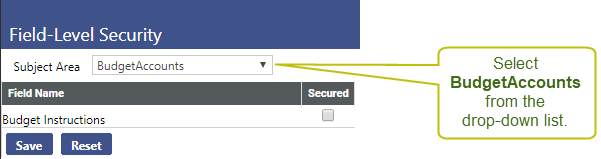
From the Subject Area drop-down list, select BudgetAccounts.
The Field-Level Security table will populate with all of the user defined fields that have been created for the BudgetAccounts subject area. In our example below, this is limited to one field, Budget Instructions.
-
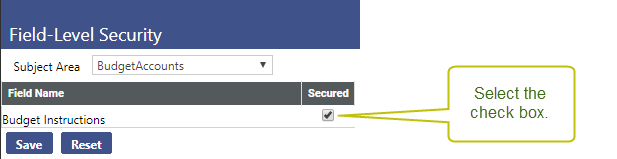
Check boxes within the Secured column indicate whether or not a given field is secured. Securing a field gives system administrators the ability to assign user permissions to the field, to decide who gets to view and/or change contents of a sgiven UDF, and who doesn’t. If a field is not secured, any user with access to the page can view/change the UDF.
Select the check box associated with the Budget Instructions field and click Save.
-
Now that the Budget Instructions field is secured, the security component BudgetAccounts-Budget Instructions will be available in User Permissions.
Go to the User List in New World ERP Maintenance and grant the appropriate user permissions: Maintenance > new world ERP Suite > Security > Users.


Add Budget Instructions to a Budget Account
This section describes how to add budget instructions to a specific budget account so that other users can view them. It involves entering budget instructions into the Budget Instructions UDF associated with a selected budget account.
- Open the Budget Accounts page: Financial Management > Annual Budget Processing > Budget Processing > Budget Maintenance.
-
The Budget Organization List page will open. Now open the organization for which you would like to define budget instructions. Do this by clicking the organization’s Organization number.
-
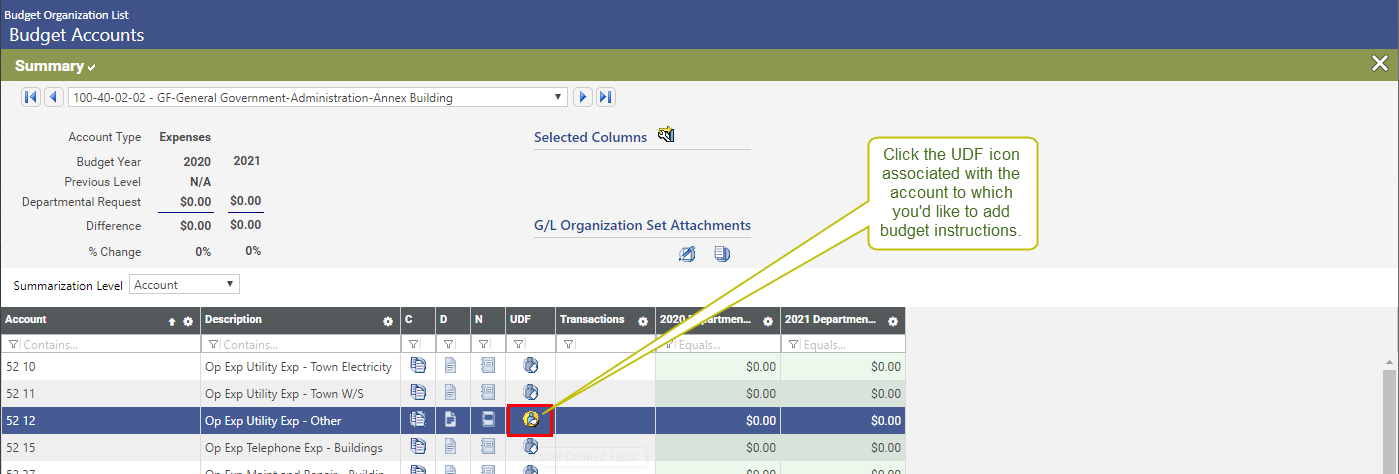
In the Budget Accounts grid, locate the account to which you would like to add budget instructions. In the account’s UDF column, click the
 icon.
icon. Tip: If the UDF column is not displayed, click the Selected Columns
 icon at the top of the page to open the Budget Maintenance Grid Configuration page. From there, select Show UDF. Click Save.
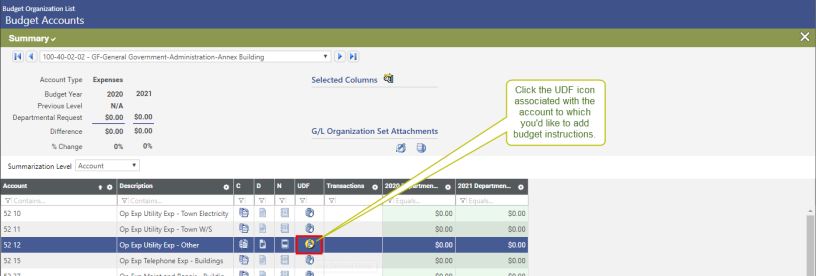
-
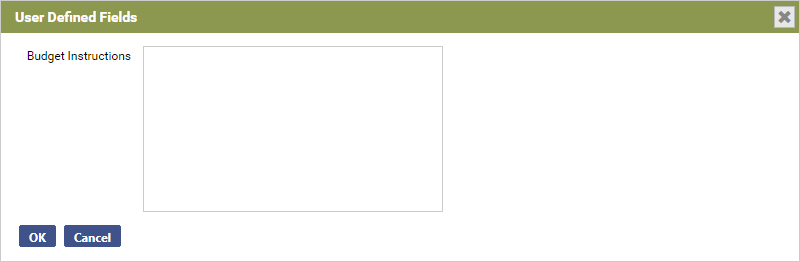
The User Defined Fields page will open displaying all of the user defined fields set up for budget accounts. In our example below, only the Budget Instructions field has been set up.
In the Budget Instructions field, type all relevant budget instructions.
Tip: If the field is too small to accommodate all of your instructions, consider increasing the field’s Maximum Length. This is done via the Add User-Defined Field Attribute window as described in the Create a UDF for Budget Instructions section above.
When you are done, click OK to save your work.
Now, whenever a user with View permissions opens the User Defined Fields window in the selected budget account, the budget instructions will be there for them to view.
Include UDFs on the Budget Worksheet Standard Report
Financial Management > Reports > Annual Budget > Budget Worksheet
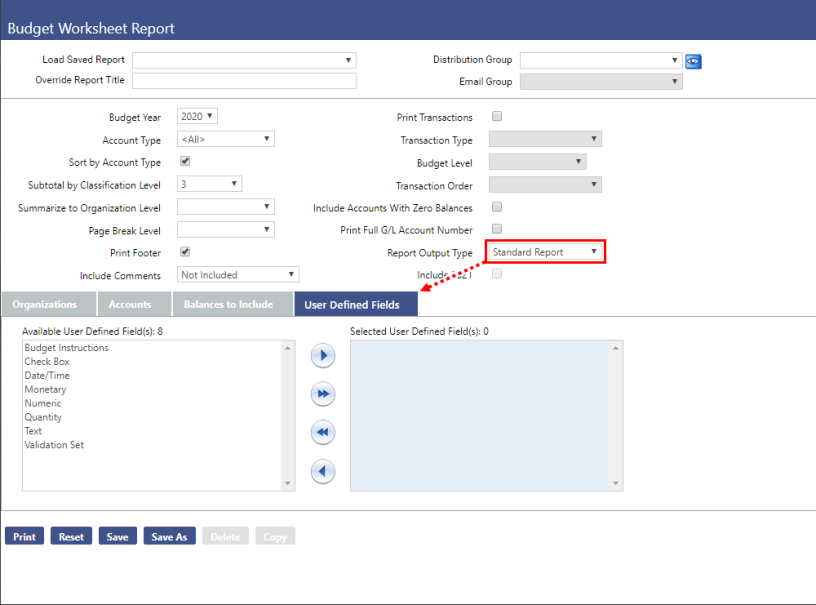
The Budget Worksheet Report page has been enhanced to allow users to include the Budget Instructions UDF on the Budget Worksheet Standard Report. In fact, users can now include any or all of the UDFs associated with the budget accounts record type.
As part of this enhancement, the User Defined Fields tab has been added to the Budget Worksheet report criteria page. This tab contains two jump boxes. The Available User Defined Field(s) box populates with all the available user defined fields. To include one or more of these fields on the budget worksheet standard report, simply move the desired field(s) from the Available User Defined Field(s) box to the Selected User Defined Field(s) box, and then click Save.
When the report is generated, the selected UDFs will be included in the report.
Note: The User Defined Fields tab is only enabled when the Report Output Type is Standard Report. The tab is disabled when the Report Output Type is anything other than Standard Report.
Set Up UDF to Carry Forward From Year to Year
Financial Management > Annual Budget Processing > Budget Preparation > Budget Methods
In FM Annual Budget Processing, UDFs are year-specific and don’t automatically carry forward from year to year. Since users will likely want to carry their Budget Instructions forward, enhancements have been made to give users the ability to select which of their UDFs to carry over from one year to the next.
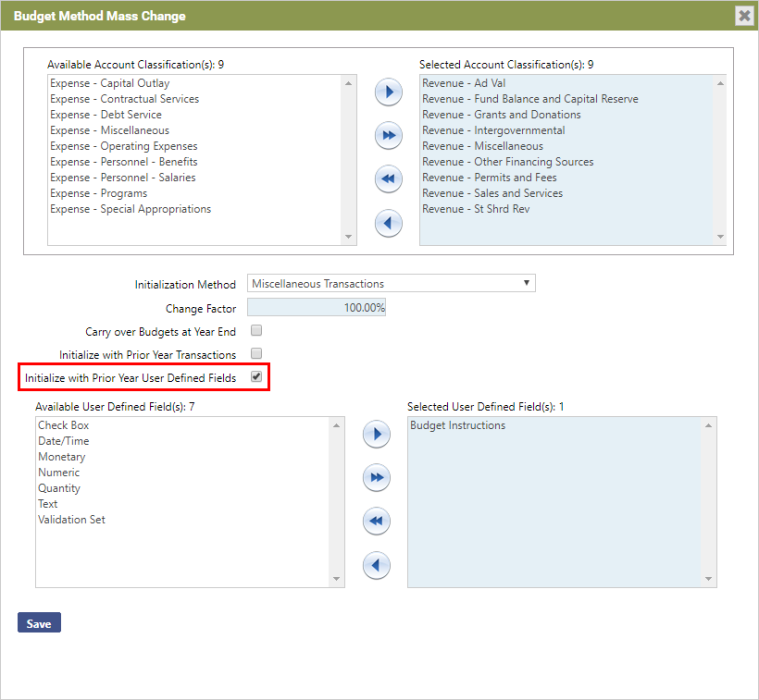
This functionality had been added to Budget Methods. Budget Methods allow users to determine the starting values for initializing budgets, such as the initialization method and change factor. In the current release, the Budget Method page has been enhanced with the addition of the Initialize with Prior Year User Defined Fields check box. For a given budget method, this control gives users the ability to select which UDFs will carry forward from year to year.
When the Initialize with Prior Year User Defined Fields check box is selected, two jump boxes appear below the check box: Available User Defined Field(s) and Selected User Defined Field(s).
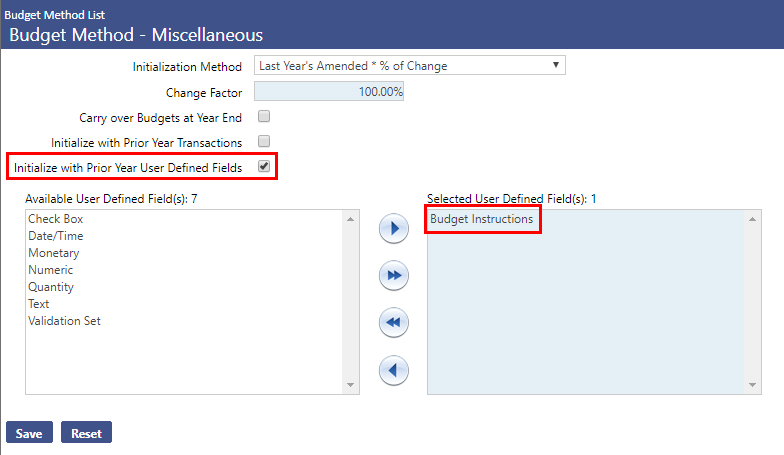
The Available User Defined Field(s) box will include all of the available UDFs. To select a UDF to carry over from year to year, simply select it and then click the right-arrow  button to move it to the Selected User Defined Fields(s) box. Do this for every UDF you would like carried forward from year to year.
Click Save. When you initialize next year, it will copy the UDFs from the previous year.
The Initialize with Prior Year User Defined Fields check box has also been added to the Budget Method Mass Change page, so users can apply this feature to multiple budget methods at once.
To access the Budget Method Mass Change page, go to Financial Management > Annual Budget Processing > Budget Preparation > Budget Methods > Click the Mass Change button.