Epson Receipt Printer Setup
The Epson H6000IV printer is currently the recommended receipt printer for the New World ERP software. To set up the Epson receipt printer, please go to the Epson website and download the Epson H6000IV driver to the user machine where the printer will be installed. A current link is below:
https://pos.epson.com/developers/techresdetails.htm?ProductPK=654

Note: The Epson H6000V printer also is supported.
Setup
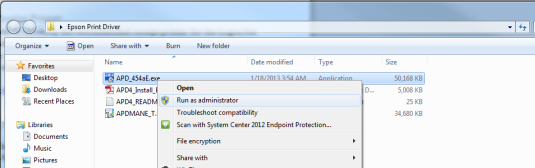
- Once the file is downloaded to your computer, run the APD_454aE.exe program. If you have an option to run as Administrator, please do so:
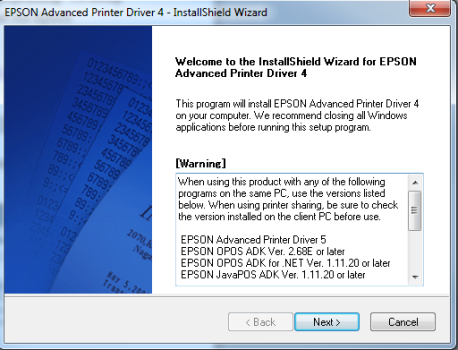
- The following screens display in the current installer. Click Next:
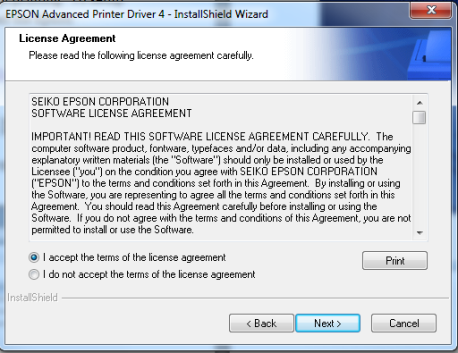
- Accept the terms of the license agreement and click Next:
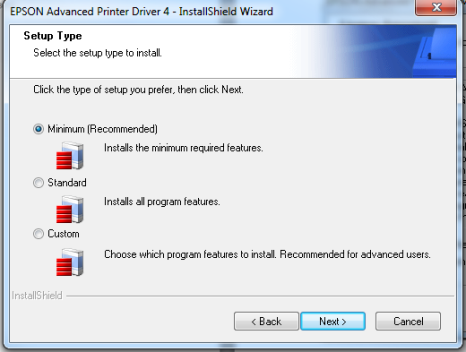
- Select the Minimum install type. Click Next:
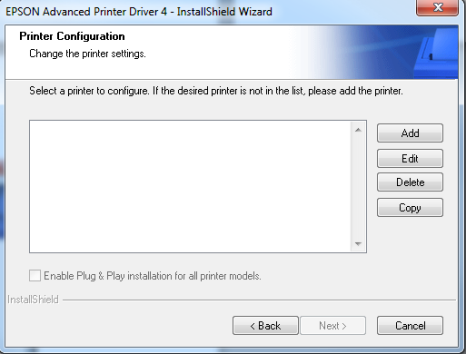
- The Printer Configuration screen displays. The Epson printer should be added with multiple heads to work with New World ERP properly. This means we will add 3 printers. Click Add to get started:
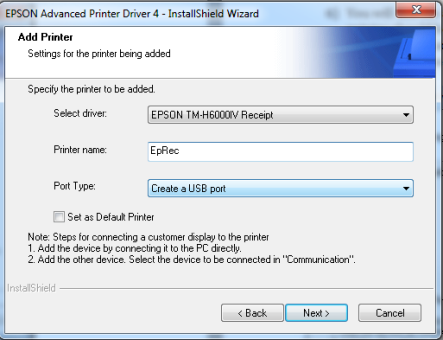
- The following screen displays. In the Select Driver drop-down, select Epson TM-H6000IV Receipt. In the Printer name field, enter EpRec and in the Port Type drop-down, select Create a USB port. Click Next:
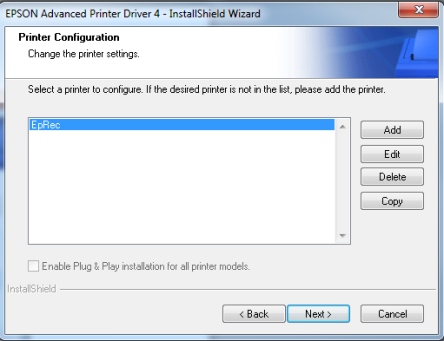
- You are returned to the home screen and your original printer is ready to be installed. Click Add again:
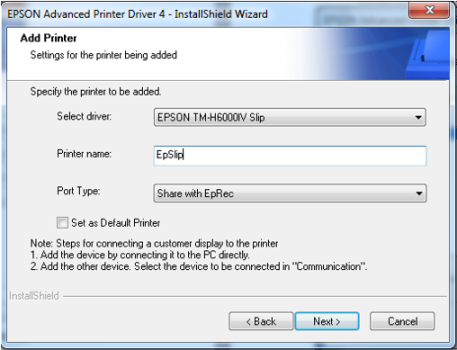
- This time, select the Epson TM-H6000IV Slip driver in the Select driver field and enter EpSlip in the Printer name field. Select Share with EpRec in the Port type field. Click Next:
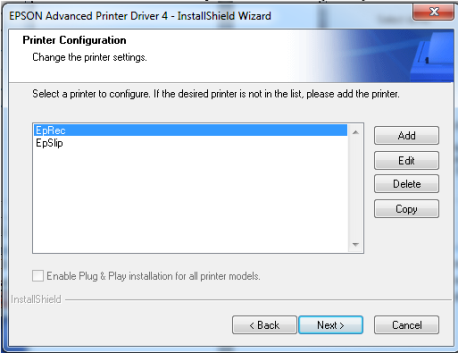
- You are returned to the home screen. Two printers now display in the list. Click Add again:
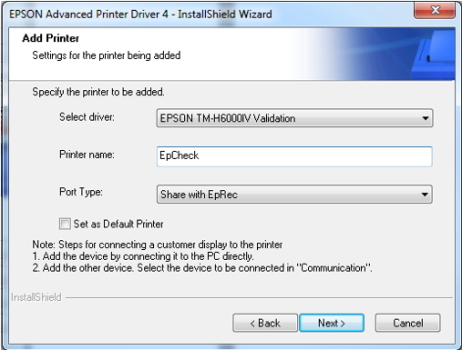
- In the Select driver drop-down, select Epson TM-H6000IV Validation. In the Printer name field, enter EpCheck. In the Port Type drop-down, select Share with EpRec. This driver is used for Form Validation in New World ERP while the Slip driver in step 8 is used for Check Validation. Click Next:
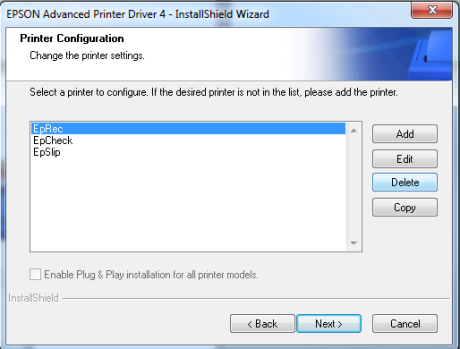
- You are returned to the home screen. Three printers now display in the list. Click Next:
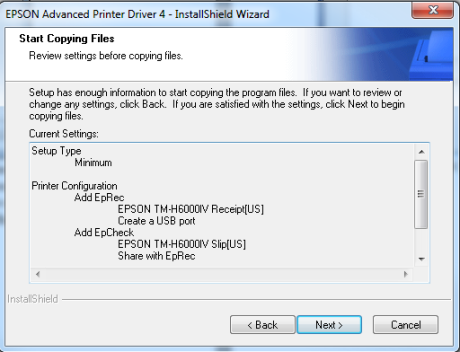
- All three printers are ready to be added. A screen similar to the one below displays. Click Next:
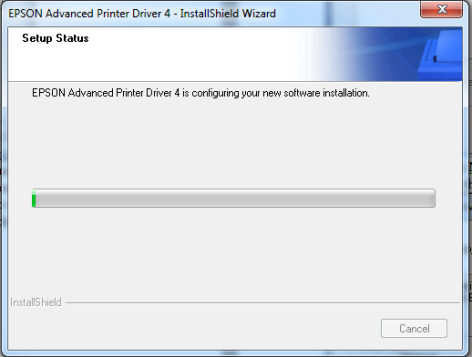
- A standard install processing screen displays:
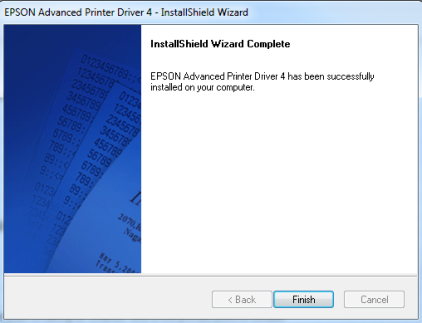
- When the installation is complete, click Finish. The printers are now installed on your system. Click Finish:
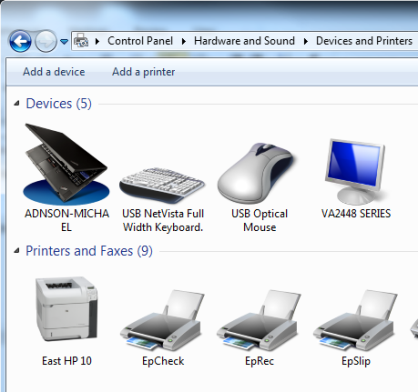
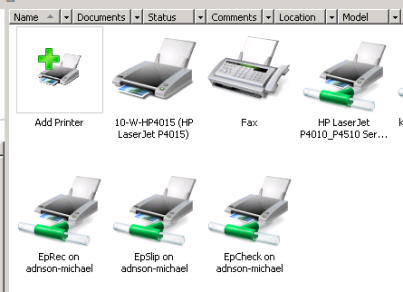
- To view the installed printers, go to the printer list in Control Panel. The three printers, EpCheck, EpRec, and EpSlip display under Printers and Faxes:
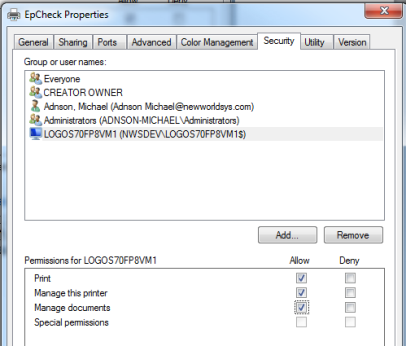
- The next step is to add security to the printers for the Application Servers on the user’s machine. In this case, my Application Server for Logos is named Logos70FP8VM1. To add security, right-click on the printer and go into the printer properties and the Security tab. Click Add:
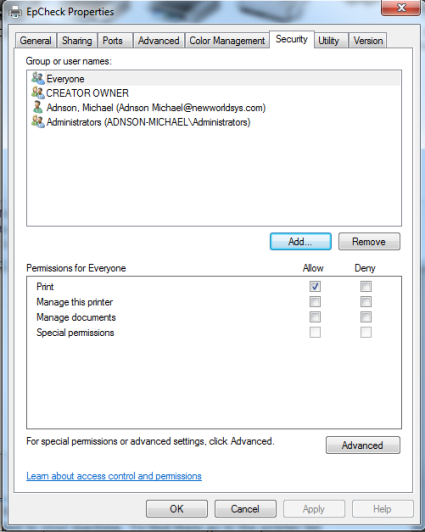
- Make sure your object types filter includes Service Accounts and Computers:
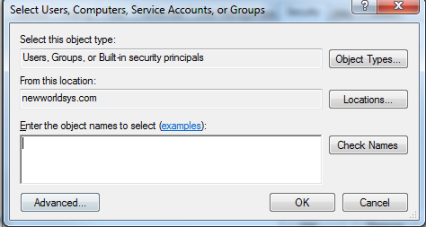

- Find the name of the App Server with a dollar sign at the end. In the example below, Logos70FP8VM1$. Add this user with full rights to the printer. Repeat this process for any Application Server that will print to this printer:
- After security has been added, it is time to share the printers on the user machine. While in the printer properties, go to the Sharing tab:
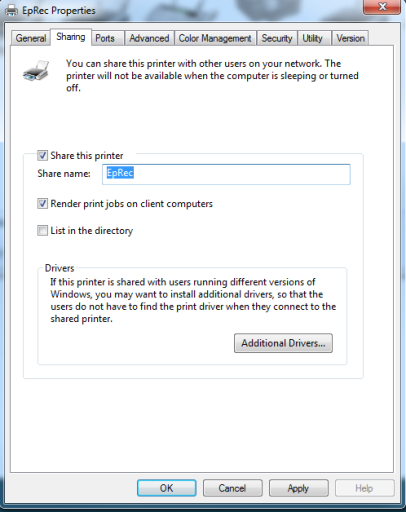
- Share the printer with the same share name as the printer name. List in the directory is an optional setting. Click OK:
- After this security and sharing has been added to all three printers, go to the Application Server through Remote Desktop or whatever remote tool is used and add those printers to the Application Server machine. Remote into your Application Server for Logos, making sure you remote into the Application Server as the user running the “{Instance Name}_New World ERP App Server” service. To find out what user that is, see Appendix A at the end of this document. Not doing this will cause slow printing of the Epson printers. After you are remoted into the Application Server as the user running the New World ERP App Server service, go to Control Panel > Devices and Printers and click Add Printer:
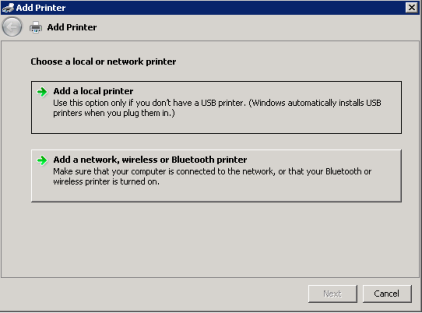
- Click on Add a network, wireless or Bluetooth printer.
- Enter the name of the printer like this: \\COMPUTERNAME\SHARENAME. When you attempt to find the printer, a pop-up to install the Epson driver (if it has not already been installed on the server) displays. Click Install driver:

- Repeat this process for the other two printers:
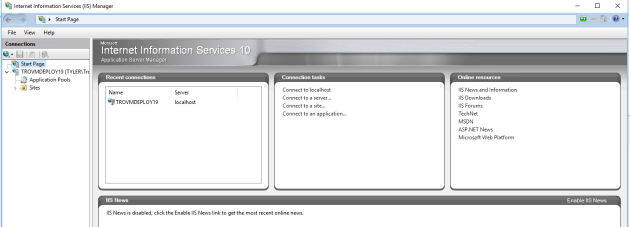
- On the Application Server, the NWERP Application Pool should be configured to run as the same user as the NWSAppService. NOTE: This will log all users out of New World ERP if changes are made to the App Pool settings. Please plan accordingly. This user should be a domain user to make sure that the Epson Cash Drawer interface allows the drawer to open from New World ERP. On the server, go to the IIS menu. 2008 and 2008 R2 Servers-Start > Control Panel > Administrative Tools > Internet Information Services (IIS) Manager. 2012 Server-Go into Server Manager > Drop down on Tools > Internet Information Services (IIS) Manager.
-
IIS will look something like this:
-
Expand your Server Name on the left. Then click on Application Pools. A screen like the one below displays:
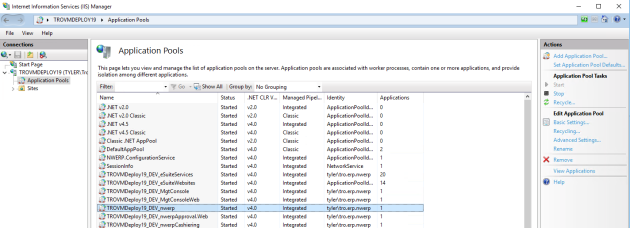
- Right-click on the {Instance Name}_nwerp application pool and go to Advanced Settings.
-
Find the Identity line item:
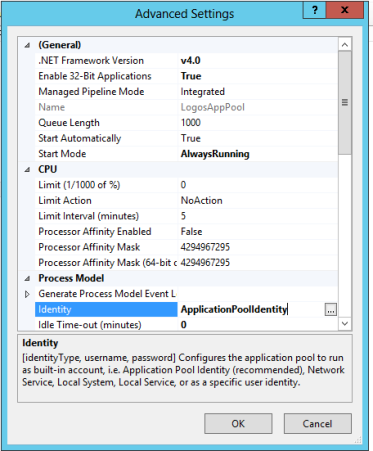
- Click the ellipsis next to Identity.
-
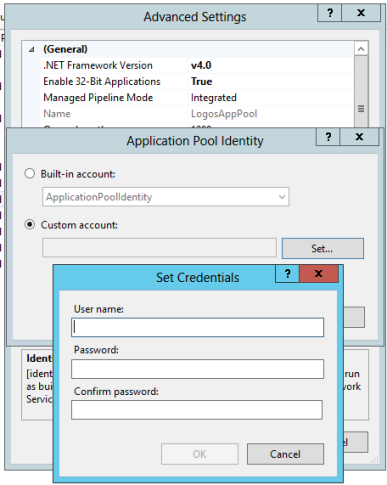
Click the Custom Account Radio button and then click the Set button. Fill in the proper domain\user that is running the NWSAppService as well as its password. Click OK. The site recycles so users have to log back in and potentially close and reopen Internet Explorer:
- Once the printers are installed to the Application Server and the App Pool settings are correct, the remaining setup occurs in New World ERP.
- Log in to the front-end of New World ERP as an administrative user. This user ID could be nws or something similar that was setup at your site. When in ERP, go to Maintenance > new world ERP Suite > Revenue Collections > Collection Stations:
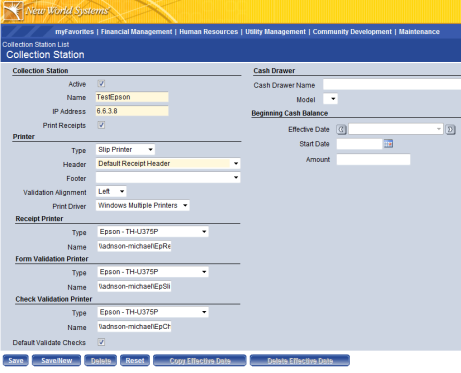
- Click New and add the printer to the station like below. The IP address does not have to be the IP address of the machine that will be doing the printing. It is recommended to enter a fake IP address in this field for Epson printing:
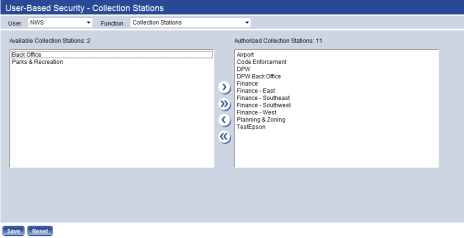
- After the station is added, add User-Based Security to the station for any user who will be printing to it. To do so, go to Maintenance > new world ERP Suite > System > Security > User-Based Security.
- Make sure your Collection Station is on the right side of the multi-select list box and not the left for any users who need security access to it:
- You may now test print to the Epson printer.
Determining Who Is Running the New World ERP App Server Service on the Application Server
- To find out who is running the New World App Server service, remote into your Logos Application Server.
- Go to Control Panel > Administrative Tools > Services.
-
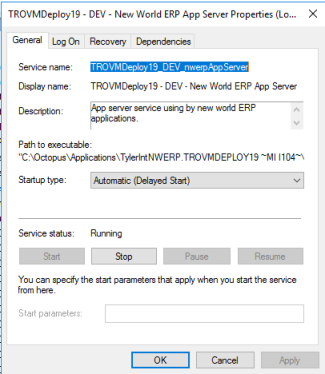
Right-click on the {Instance Name} New World ERP App Server and choose Properties:
-
Click on the Log On tab:
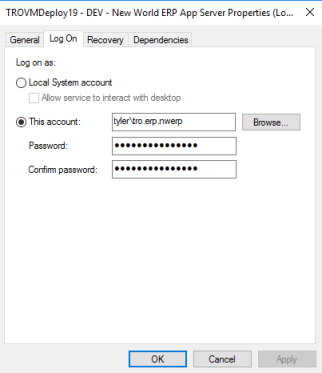
- In this case, the software is running as a domain user named tro.erp.nwerp on the Application Server.
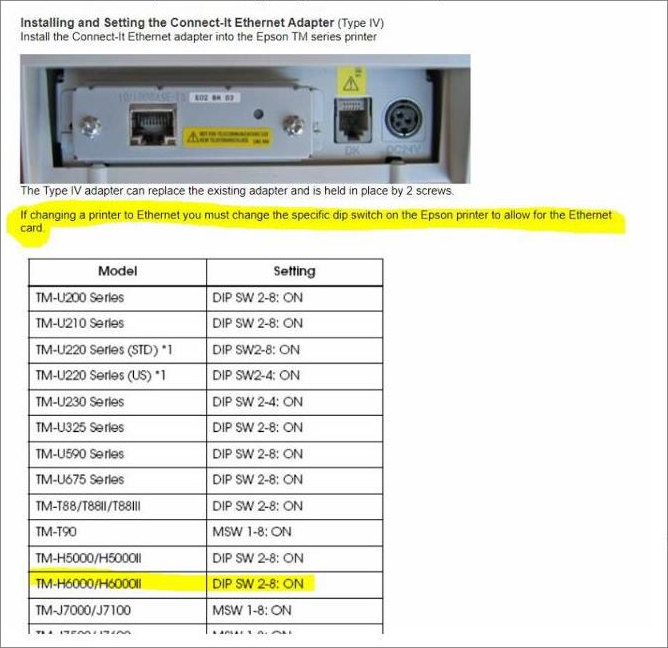
Adding a Network Card to the Printer
On occasion, an NIC may need to be added to the printer. If so, dip switches need to be configured. Dip switches are located on the bottom of the printer: