1099 Register
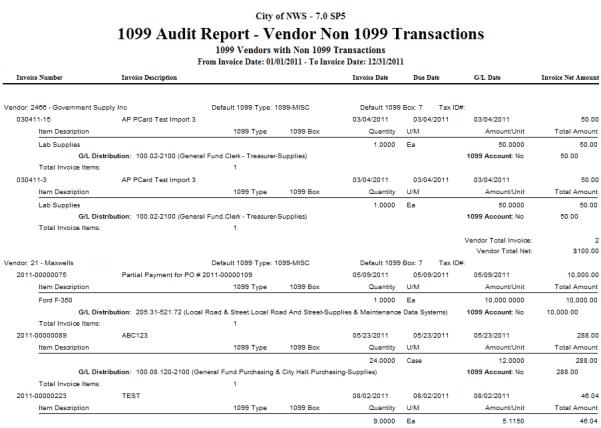
The 1099 Register page shows all the transactions for each 1099 vendor, sub-totaled by vendor. All transactions are listed in this report, which includes transactions for vendors that did not exceed the minimum amount required to print a 1099. This report allows you to verify the inclusion of all valid 1099 transactions and also the exclusion of non-1099 transactions.
To access the page, go to Financial Management > Year-End Processing > Vendor 1099 Processing and click the 1099 Register  icon.
icon.
To generate a report and view transactions for 1099 vendors, follow the steps below:
- Select the Tax Year. The current tax year is the default value.
- Select the Company Federal Tax ID. This field is required. Many organizations have only one Company Federal Tax ID, but in the case of a multi-company scenario, the register may be run for only one company at a time.
- Select theValidatedstatus for transactions that should be included in the register. The default value is <All>; the other options are Validated and Not Yet Validated.
- Select the Report Type.
Options are Summary, Detail, Detail with G/L Distribution, and User Adjustment
Listing. Detail is selected by default.
- If Summary is selected, the report displays the vendor’s Name, Number, and Address information, plus the box totals for the vendor’s 1099.
- If Detail is selected, the report displays the Payment Date, Invoice Number, Invoice Date, Item Description, and Item Amount for each vendor receiving the 1099 type(s) selected.
- If Detail with G/L Distribution is selected, the report displays the same information as the Detail report, but also includes the G/L Distribution for each invoice item.
- If User Adjustment Listing is selected, the report displays only those vendors whose 1099 information has been adjusted for the 1099 type(s) selected. It displays the vendor’s Name and Vendor ID, the Box Number where the value was changed, the Original Amount, the Amount on 1099, and the Adjusted Amount.
- Determine whether Exceeding Minimum Only should be selected. By default, this check box is not selected. If it is not selected, 1099 transactions for all vendors, regardless of the amount, will appear on the register. If the check box is selected, only vendors whose transactions exceed the minimum amount required to print a 1099 will appear on the register.
- TheInclude All Remittance Addressescheck box is cleared by default. Select it if all additional contact remittance addresses for a vendor should appear in the listing.
- Select the 1099 Types that should be included on the register. At least one 1099 Type must be selected. Select the Type and click the Move button to add just one type, or click the Move All button to add all types.
- Click Print to run the 1099 Register.
- If you want to save the report criteria, click Save and provide a name for the report. Then click Print. The 1099 Register is sent to myReports.
See Also