Installing Patches with Tyler Deploy
Tyler Deploy is the upgrade and patching mechanism for New World ERP. As such, the Managed Internet Update (MIU) is deprecated in version 2019.1 of New World ERP. Regardless of patch mechanism, patches should still go through the standard software life cycle of a training (if applicable), test and then production environment. Patches should not be applied to the production environment first for numerous reasons, one being the delta it creates when copying the production database back to the test database.
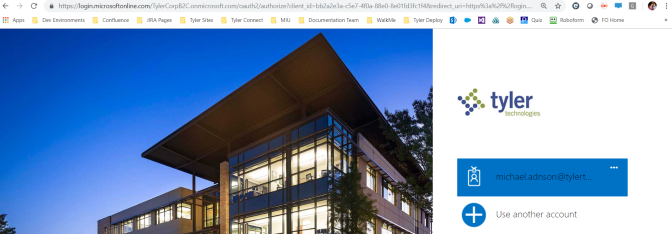
Patches are released on a cadence based on New World ERP development cycles. Releases are broadcast via the blog in Tyler Community, and patch notes are published in Help Central. Deployment staff (those on site or in hosting with rights to do installs and patching) navigate to Tyler Deploy and sign in with their Tyler Community accounts. The Sign In button is located in the top right-hand corner:

After Sign In is clicked, a Tyler Community login page displays. Use your Tyler Community account. Please note that not everyone can log into Tyler Deploy. Only identified deployment staff are allowed to deploy software. Tyler staff needs to denote the appropriate on-site resources to be able to log into Tyler Deploy. We may ask you who the appropriate staff are at your organization.
After logging into Tyler Deploy, you should be taken to your organization’s account. If you manage multiple accounts (School ISD or consortium IT Department, etc.), you will be able to manage and inquire on separate accounts using the Select Client icon in the top right-hand corner of the page.
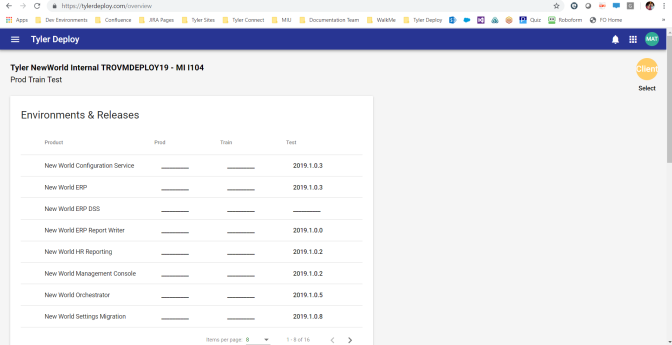
New World ERP is organized into several smaller projects such as New World Configuration Service, New World ERP, New World ERP DSS, New World eSuite Services, New World eSuite Websites, etc. You will see a variety of these projects in Tyler Deploy depending on what you license with us; however, we have simplified the patching process by creating a project called New World Orchestrator. This project will install all your pertinent software for you in the proper order and at matching versions.
To view a brief video on how to use the New World Orchestrator to check for patches and deploy them, click here.
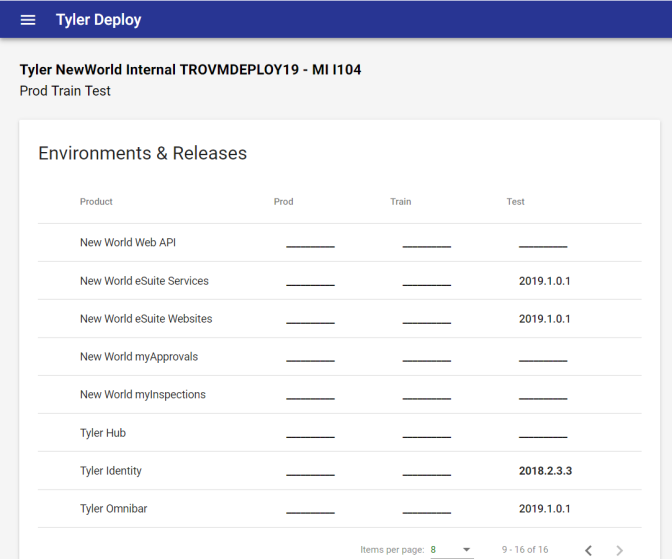
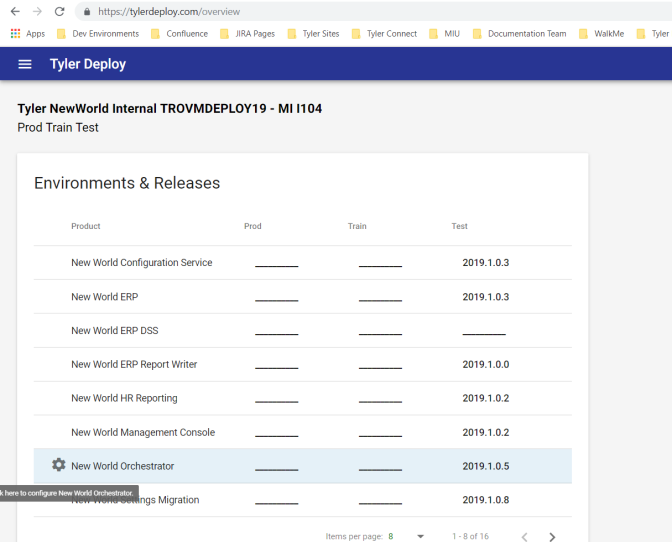
In the Environment and Release area, software packages on the latest release will appear in normal text. Software packages with a patch or update available will show up in bold text. For instance, in the screenshot below, Tyler Identity has an available update while Tyler Omnibar does not. You can also use this area to compare versions of software across servers at a glance. An Items per Page drop-down exists to allow you to see the number of software packages you prefer with reference to paging.
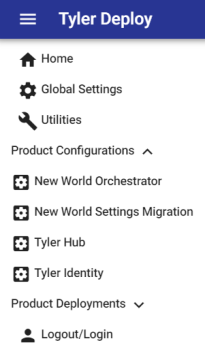
Each project gets configured with installation variables such as install drives, user names, etc. To configure a project, you can either go through the hamburger menu in the top left-hand corner of the page and find the product under the Product Configurations header or by clicking the gear that appears to the left of a product when you hover over it.
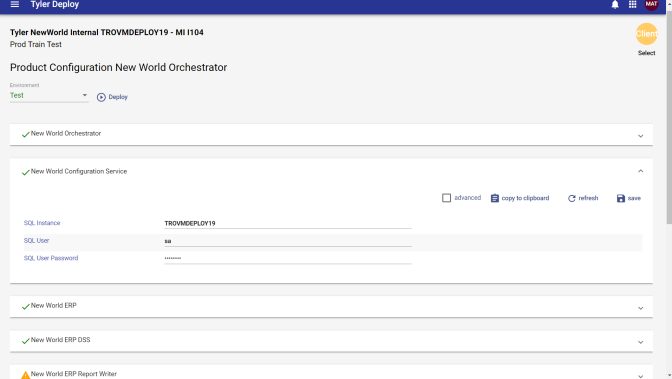
Once you have accessed the configuration screen for a product, you will need to choose your environment type. Each header banner will indicate with a green check mark for a fully configured product or a yellow yield sign for a product missing some variable configurations. In the example below, New World Configuration Service is fully configured while we would need to expand New World ERP Report Writer to configure its values.
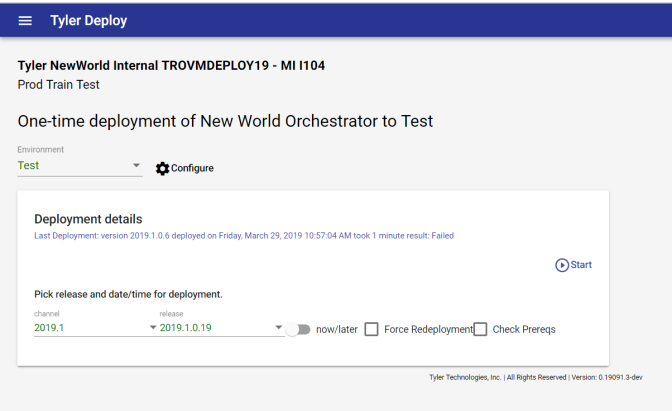
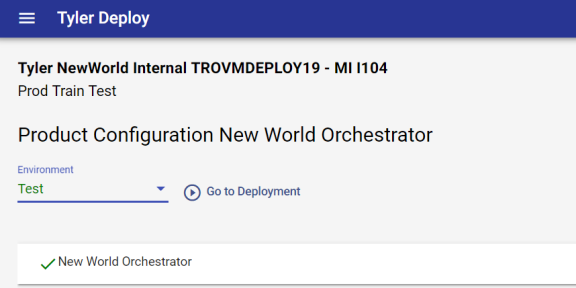
After configuring all values on a page, you are ready to attempt a deployment of a product. You can do this by choosing the product under the Product Deployments section of the hamburger menu, by clicking Go to Deployment at the top of a project page (will take you right to the deployment screen for that product and environment type), or by clicking the Version Name on the homepage for the product and environment you would like to upgrade.
After reaching the deployment screen for a product through one of the various methods, you will be presented with a screen like the one below. The Channel drop-down represents the release family for which to apply an update. The Release field is the actual update level you would be applying. Once a release is applied to an environment, you will not be able to go back to a lower level release in Tyler Deploy. The Force Redeploy check box allows you to reapply a release level to an environment. This feature could be helpful when a new test environment is built. The Check Prereqs check box will check for and install prerequisites for the product. New World ERP is not planning to use this feature at this time. The now/later toggle allows you to apply updates in real-time or schedule them for a future deployment.