Cross-Version Upgrades
During certain phases of your Tyler new world ERP project, the LIVE version of the software may not match the TEST version. Additional steps are required if you wish to move an older (2018.1) version of the LIVE database into a new (2019.1) TEST environment. This document also applies if live and test are running different patch levels of the same release of New World ERP where test is higher patched than the live environment.
- Stop all new world services on the TEST application server. From an elevated command prompt, perform an IIS reset. In version 2019.1, you can go to the NWERP Management Console (https://APPSERVERHOSTHEADERMAPPING/managementconsole#/Base). Only users with security access in the ManagementConsoleGroup_INSTANCENAME security group on the application server will be able to access this site.
-
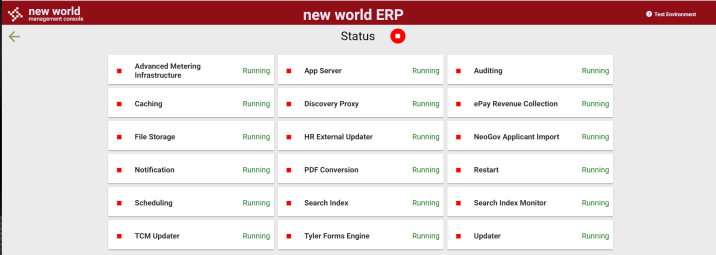
To stop all services, click on the vertical ellipsis on the New World ERP card and choose View Status.

-
From this page, ERPservices can all be controlled separately or with one click of a mouse. The master status button at the top will either stop or start all ERP services at one time. Please note that all users will be kicked out of the software when you stop all services.
- After stopping the services, the Default Web Site needs to be stopped in IIS.
- Backup and restore the live ERP and eSuite databases to the test environment.
-
On the application server, navigate to the following directory. Please note that some parameters are dynamic in the folder path: {Install Drive}\Octopus\Applications\{InstanceName}\{EnvironmentName}\NWERP.DBUpgradeUtility\{VersionName}. An example of this path is: C:\Octopus\Applications\TylerIntNWERP.MI.I104.TROVMELA19F1\DEV\NWERP.DbUpgradeUtility\19.1.1.45-2019F1.
Note: An error may occur with this utility if it is run from a folder path that is too long. It is often best to copy the folder it runs from to C:\Temp, or a similarly short folder path, and run it from there.
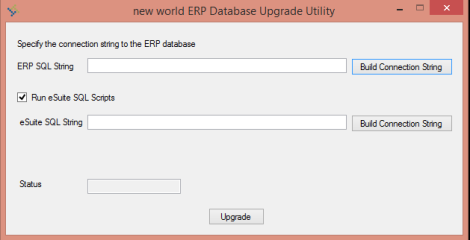
- Run ERPDatabaseUpgradeUtility.exe.
-
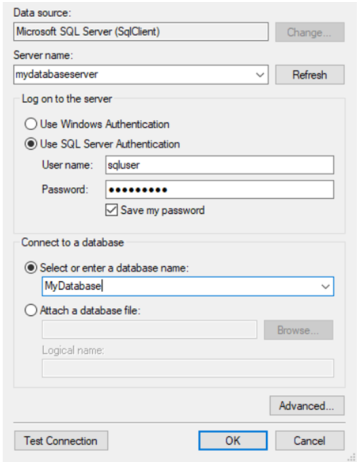
Click on the first Build Connection String button and enter the SQL server connection information to the ERP database.
-
If you have also restored a copy of your eSuite database, click the second Build Connection String button and enter the SQL server connection information to the eSuite database. If you do not license eSuite or have not restored a copy of the eSuite database, please deselect the Run eSuite SQL Scripts check box.
- Press Upgrade to begin the process. Once the process has completed a new window will display indicating completion.
- Restart the TEST application server to have all new world ERP services start in order, as normal. To do this you can use the same Service Status screen as above and start all services. The Default Website would also need to be started in IIS.