Tyler Identity User Account Management
Note: The User Account Management pages are best viewed in the Chrome web browser.
Preparing for a Migration of Your Users to Tyler Identity
The first step in getting ready to migrate to Tyler Identity is to analyze your SecurityUser data in the New World ERP database. Identity has two major rules: Active users need to have a unique email address, and every user you want to migrate to Tyler Identity needs to have an email address on their record in the SecurityUser table. If you are using Active Directory Integration, this email address should match the email address configured for the user in Active Directory.
- Tyler Identity requires each user to have a unique email address on their record. If integrating to AD, this email address should be the address on the account in Active Directory. To check for duplicate email addresses, run the following SQL Script against your ERP database:
Select EmailAddress,Count(*) from SecurityUser Group by EmailAddress Having Count(*) > 1
- To check for users with no email addresses or null email addresses, run the following query. These users will not migrate to Tyler Identity:
Select LoginID, UserName, EmailAddress from SecurityUser WHERE (EmailAddress is null or EmailAddress = '') AND InactiveFlag = 0
Password Security Options (for non-AD setups)
To manage password complexity requirements in Tyler Identity, a site will be running on the Tyler Identity server. This site’s URL would look something like the following (this example is for a test environment; replace test with whatever your environment was named in the Identity install):
https://SSLCertName/ENVIRONMENTNAME/tylerid/configuration
There is a default user and password for this site. We recommend you change this password after installing Identity (more detail on that later in this document):
User: tyleridentityadmin@tylertech.com
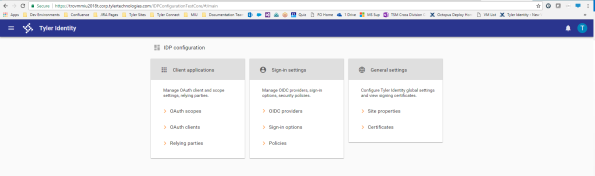
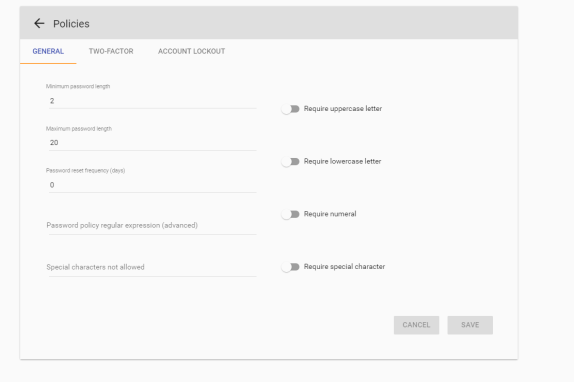
Click on the Policies link.
The GENERAL tab contains settings for password complexity options, including requiring uppercase letters, special characters and numeric characters in passwords.
In New World ERP, we are not currently using the TWO-FACTOR authentication option, and all account verification will be done through email address verification.
The ACCOUNT LOCKOUT tab can be configured to change the lockout time for a user and the number of failed logins before a lockout occurs:
Changing a User’s Password
Note: If Tyler Identity is configured to authenticate against Active Directory this section does not apply.
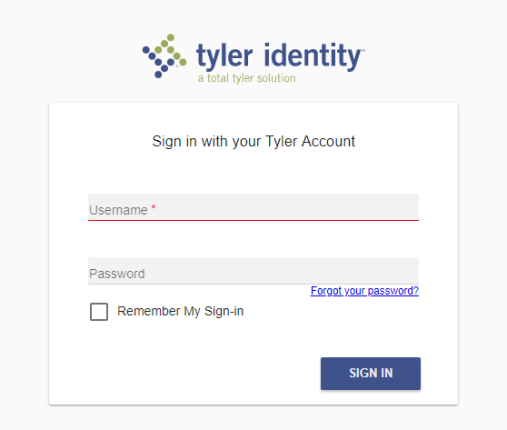
There are multiple ways to change a user’s password in Tyler Identity. The first is through the New World ERP software itself. Users can use the Forgot your Password? link on the login page or, once logged in, utilize the Reset TID Password link on the My Settings page:
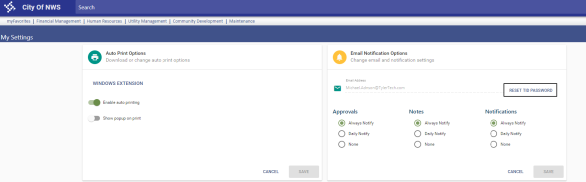
Users would be taken to this page, where they could change their password:
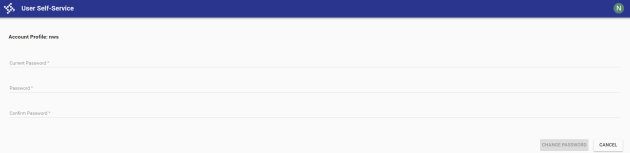
Alternatively, users can access the same site through the Tyler Identity pages. To do this, go to the https://sslcertname/ENVIRONMENTNAME/tylerid/userprovisioning, where SSL Cert Name is the SSL certificate used on the Tyler Identity server and the ENVIRONMENTNAME variable is the name of the virtual directory for this environment in SSRS. Log in using the user’s user name and password:
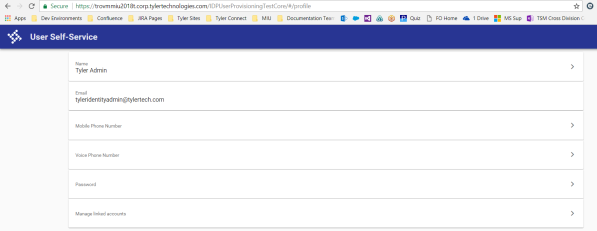
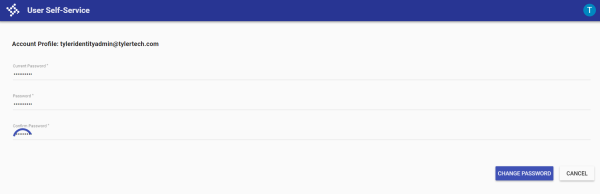
Click the  icon on the Password card. Enter your previous password and the desired password and click CHANGE PASSWORD:
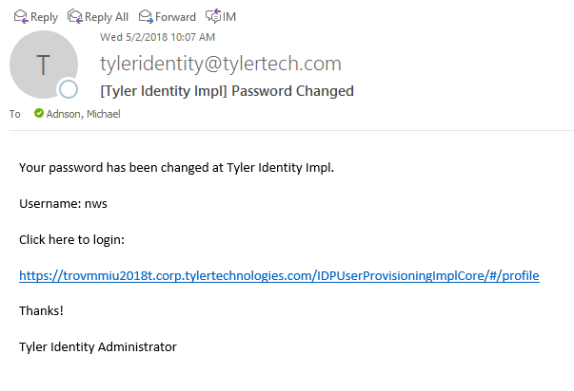
After the password is changed, a user will receive a confirmation email of the change:
Adding a new AD Account and linking to ERP
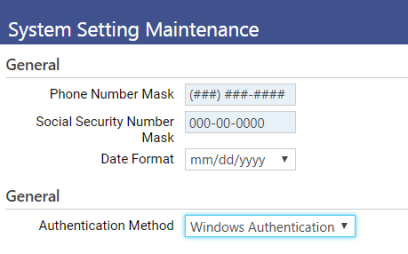
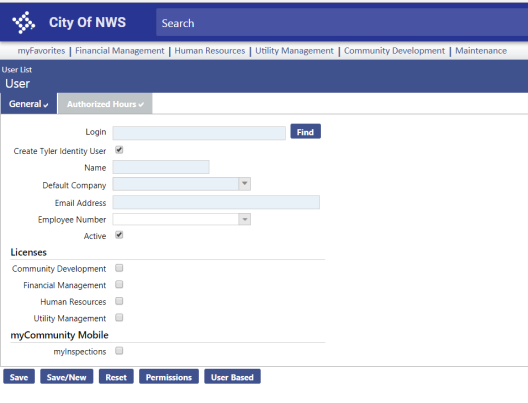
- The Authentication Method on the System Settings Maintenance page drives the type of users that will get created in Tyler Identity, either AD or TID. If the setting is set to Windows Authentication, as shown below, the Find button will show on the Security Users page as it did in the past:
- In Maintenance > New World ERP > Security > Users, when you add a new user with Windows Authentication set in the location described in Step 1, you will see the Find button:
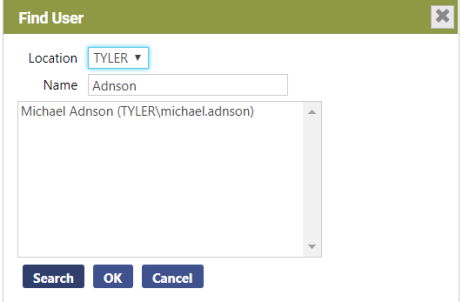
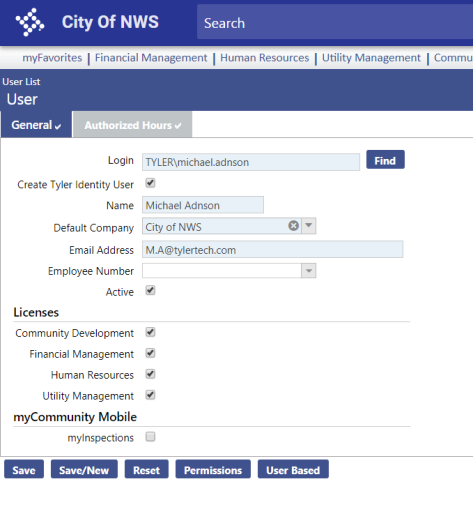
- Clicking the Find button allows you to search for and select that user in AD. After highlighting the user and clicking OK, the User page redisplays, and the user’s Email Address is pulled in from AD:
- To finish creating the user, fill out the remaining required fields and ensure Create Tyler Identity User is checked. When you Save, a process will create the Tyler Identity user and allow the user to log directly into ERP with their current AD user name and password. Passwords for AD accounts are not stored in the Tyler Identity database and are continually checked against Active Directory:
Enabling the “Forgot Password” link on the Identity Login Homepage (for non-Active Directory setups)
To enable the Forgot My Password link on the Tyler Identity login page, go to https://SSLCertName/ENVIRONMENTNAME/tylerid/configuration, where ENVIRONMENTNAME is replaced by the server’s TylerID virtual directory name in IIS (test/train/prod, etc). Log into the site with an administration user. The default user and password are the tyleridentityadmin@tylertech.com user and password as described earlier in this document.
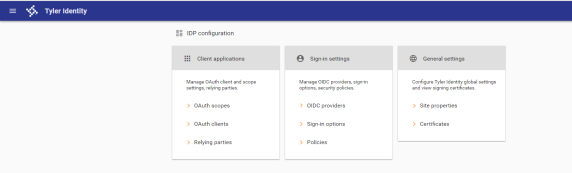
After you are logged in, click Sign-in options on the middle card. To enable the Forgot your Password link, enable the Show the Forgot your password? Link option:
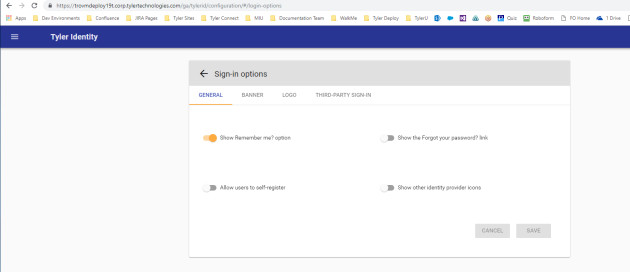
On the next login to New World ERP, you will see the Forgot your Password? Link to initiate the password reset process.
Note: An iisreset is required on the Tyler Identity server before the Forgot your Password? Link will appear.
Enabling another Admin user for Tyler Identity Administration
Note: If Tyler Identity is configured to authenticate against Active Directory this section does not apply.
It is a good practice to enable another user or set of users (other than tyleridentityadmin@tylertech.com) to be able to manage Tyler Identity accounts and configuration.
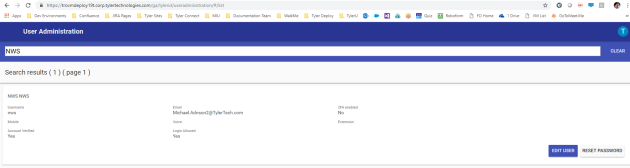
To do this, go to https://SSLCERTNAME/ENVIRONMENTNAME/tylerid/useradministration, where SSLCertName would be replaced by the name of your SSL Certificate on the Tyler Identity server, and ENVIRONMENTNAME is replaced by the server’s TylerID virtual directory name in IIS (test/train/prod, etc).
On the first login to this site, the tyleridentityadmin@tylertech.com user would need to be used. Search for a user you would like to be an admin:
When you have found the user you would like to enable as an admin, click EDIT USER, and go to the CLAIMS tab. Add a claim for ConfigurationAdmin with a value of true and a claim for role with a value of IdentityManagerAdministrator, as shown below:
![]()