Reassign Receipt
Financial Management > Revenue Collections > Receipts > Batch Number
A Reassign button has been added to the General tab on the Revenue Collection Batch page:

This button lets you reassign a receipt from one batch to another.
Note: This feature cannot be used in batches associated with an active Collection Station listed on the Virtual Payment Source List page (Maintenance > new world ERP Suite > Revenue Collection > Virtual Payment Source) or batches that originate from Cashiering or Payments.
To use this feature, follow these steps:
- Navigate to Financial Management > Revenue Collections > Receipts. The Revenue Collections Batch List page displays.
- Click the Batch Number. The Revenue Collection Batch page displays.
- Select the row of the receipt you want to reassign.
-
Click the Reassign button. The Reassign Receipt popup displays:
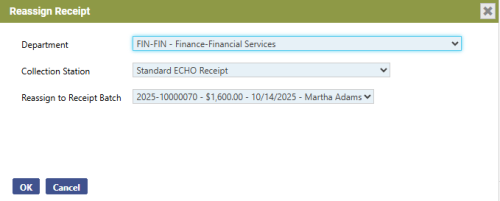
- Select the Department. The department from the current batch is the default. The dropdown contains all the departments you are authorized to in Process Manager for Revenue Collections Receipt Entry.
-
Select the Collection Station. The dropdown contains all the collection stations you are authorized to in User-Based Security.
- Select the Reassign to Receipt Batch. The dropdown contains all the open receipt batches that are on the receipt batch list. The selection displays the number of the target receipt batch, the total receipt amount, the G/L date and the cashier.

-
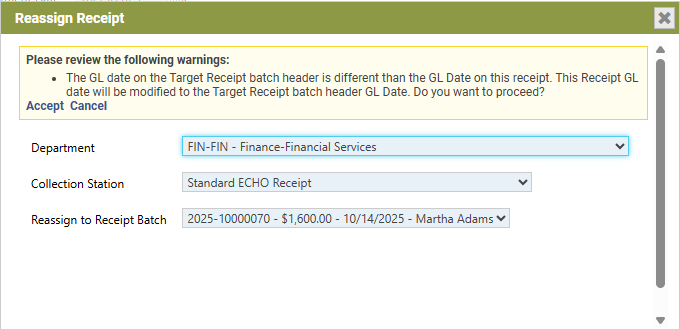
After making your selections, click OK. If the G/L date of the target receipt batch differs from the G/L date on the receipt being moved, a warning displays, saying the receipt G/L date will change to the target receipt batch G/L date:
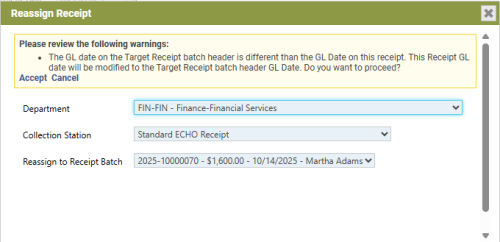
- To proceed with the reassign process, click Accept; to exit the process, click Cancel. Clicking Accept removes the receipt from the receipts grid on the General tab and adds it to the target receipt batch grid.
For the Reassign button to display on a user's Revenue Collection Batch page, the user needs permission to the Revenue Collection Reassign Receipt security component:
- Navigate to Maintenance > new world ERP Suite > Security > Users. The User List page displays.
- Use the filter in the User Name column to search for the user.
- Select the user's row.
- Click Permissions. The User Permissions page displays, containing a grid of security components and a filter panel.
- In the Applications filter, select Suite.
- In the Feature Group filter, select Revenue Collections.
-
In the Search Security Components filter, type Reassign. The grid refreshes to display the Revenue Collection Reassign Receipt component:
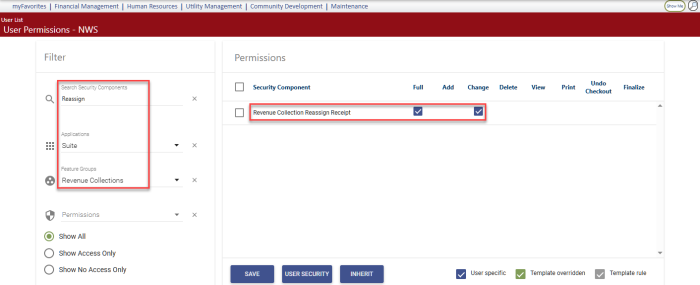
- Select Full permission.
- Click Save.
- For the permission to take effect, the user must log off and log back on.
