Asset Service
The Asset Service page allows you to search for and view a list of all assets to which you have inquiry authority. You can also add new assets on this page. Before users can enter assets into New World ERP, the system administrator in your organization must first set up the asset information that will display for users viewing and adding assets.
To access the Asset Service page, go to Financial Management > Asset Management > Asset Service. Expand a section below for more information on searching for assets and the data that displays on the Asset Service page.
For information on adding a new asset record see Add an Asset; for information on maintaining an asset record see Edit an Asset.
There are two ways to search for an asset.
- Click Go to return all active, recorded assets (leave the Asset Number and Description fields blank) OR
- You can also enter an Asset Number or Description to narrow down the search and click Go. To modify the search beyond these two fields (i.e., to look at unrecorded assets, pending assets, assets assigned within a specific department, etc.) click on the magnifying glass
 in the upper left-hand corner to do an advanced search.
The following buttons are provided for you to control the way the list of assets displays on your screen.
 — Enables the Autohide feature. When you click an asset folder or an item within the folder, the list of Assets is collapsed and the asset information displays in full view on the right side of the screen.
 — Disables the Autohide feature. When you click an asset folder or an item within the folder, the list is displayed while the asset information displays on the right.
 — Hides the Search pane and expands the Results pane to display the asset information in full view.
 — Shows the Search pane and Results pane side-by-side.
Advanced Search
Using the advanced search option, you can customize your own search page and even save the specific search criteria to be used later. If this is your first time opening the Search Assets window and/or you have not previously saved any search defaults, all sections in the window are expanded. In the Search Assets window, click the minus sign (–) to collapse and hide the fields you do not want to search on, or click the plus sign (+) to expand a section.
Perform a Search
To perform a search, enter or select information in any of the fields and click Go. To search for all assets in the system, leave all fields blank. Results display on the Asset Service page that meet the search criteria you entered.
Save Search Defaults
To save your search criteria for use later, enter or select information in any of the fields and click Save Search Defaults. The next time you open the Search Assets window, the search criteria you entered is saved in the fields. In addition, the sections you expanded or collapsed retain that setting in the window. After you have a saved search, you can execute your search by clicking Go on the Asset Service page. You do not have to open the Advanced Search each time.
Restore Saved Defaults
If you make changes on any of the fields in the Search Assets window, but want to return to the way the settings were when the search defaults were last saved in the window, click Restore Saved Defaults.
Reset
To clear the data in the fields in the Search Assets window, click Reset. All fields are blank and the sections in the window are expanded.
Expand All
When you click Expand All, all collapsed sections in the window expand.
After a search is performed, the page updates to display a list of assets on the left side that match the search criteria you entered. On the right side, there are various panes of information.
Left Side
When you click an Asset folder ( ), the list expands to display several items from which you can select to view different information about an asset, such as asset History, Documents, Invoices, and Procurement information. When you click one of these items in the Tree View section, the information displays accordingly
in the Results section on the right side of the screen. The information that displays in the Results section changes based on the selection made in the Tree View section.
), the list expands to display several items from which you can select to view different information about an asset, such as asset History, Documents, Invoices, and Procurement information. When you click one of these items in the Tree View section, the information displays accordingly
in the Results section on the right side of the screen. The information that displays in the Results section changes based on the selection made in the Tree View section.
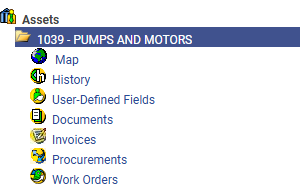
- Map — This functionality is under development and not available.
- History — Allows you to see history for various attributes of the asset. Each attribute is expandable and collapsible to show the relative information.
- User-Defined Fields — Allows you to view information tracked by your organization.
- Documents — Allows you to add and view documents that have been added to the asset via the Document Viewer.
- Invoices — Allows you to view any invoices that are associated with the asset.
- Procurements — Allows you to view any purchase orders that are associated with the asset.
Right Side
On the right side of the screen there are various panes of information. If the asset has not yet been recorded there is one pane (General). If the asset has been recorded there are at least two panes (Summary and General). If the asset is a parent asset to a transferable asset then there will be a pane called component history. If the asset is transferable then it will have a pane called parent history.
The panes can be expanded and collapsed at any time by clicking either of the buttons listed below or by clicking anywhere on the yellow pane.
— Expands or opens a tab.
— Collapses or close a tab.
Summary
The Summary pane allows authorized users to view general information about a specific asset. It shows the asset value, life, and acreage information.
General
The General pane allows authorized users to view general information that was entered for the asset. Each sub heading (detail, capitalization and depreciation, department, etc.) can be expanded and collapsed as needed. Included in the general pane is the ability to print, edit, add notes and search based on the effective date.
Buttons
At the top of the General tab within the banner title bar, there are several buttons available you can click to perform a variety of functions.
Print — Opens the Asset Data Sheet pop-up window where you can select the asset information you want to print in a listing, which is sent to myReports.
Edit — Opens the General page where you can edit the asset information. By clicking on Edit, the system allows you to change the information about the asset. If the asset has not been recorded, all of the fields are fully editable. If the asset has been recorded only a few fields can be changed. To change the fields that are not editable another process will need to be performed, such as adjustment or correction to the asset.
Notes — Opens the Asset Notes page where you can create and maintain extra notes about the asset. You can add notes to an asset at anytime. These notes are available to users who have the proper security.
Effective Date — The effective date allows you to look at a different point in time and see the asset attributes on that particular date. The effective date defaults as the current date. To see the attributes on a specific date, enter or select a date and click the Refresh (![]() ) button.
) button.
Parent History
The Parent History pane displays for all assets that have a special use of transferable. This shows the parent to which the asset is assigned.
Component History
The Component History pane displays for all assets that are selected as parents for transferable assets. This lists all of the components assigned to that particular asset.
See also: