1099 List
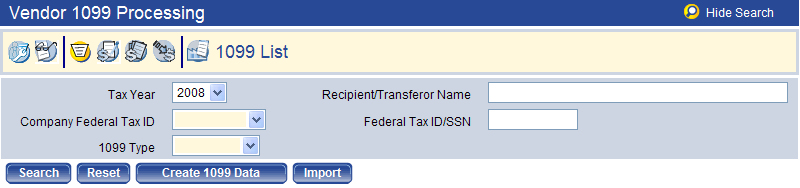
On the 1099 List page, you can view a list of 1099 form recipients. If data has been created, you can use the Search criteria to display the results. Otherwise, you need to create the 1099 data for the vendor.
To access the page, go to Financial Management > Year-End Processing > Vendor 1099 Processing and click the 1099 List  icon.
icon.
Creating 1099 Data
The first step in vendor 1099 processing is to create the 1099 data for the vendor. To create 1099 data, follow the steps below:
- Click Create 1099 Data. The Create 1099 Data dialog box appears. The Tax Year and 1099 Type selected on the List screen are displayed as default values on the Create 1099 dialog box.
- Select a Company Federal Tax ID from the drop-down list. Leave the Vendor field blank to create 1099’s for all vendors.
- Click Create. If 1099 data already exists for the vendors, you will see a “1099 Data exists for selected vendor(s). Overwrite this data?” message.
- Click Cancel after the data is created successfully. You can now view existing 1099 data on the 1099 List page.
Searching for and Viewing 1099 Data
After the 1099 data has been created or imported, it can be viewed on the 1099 List page. To view existing 1099 data on the 1099 List page, follow the steps below:
- Select the Tax Year. The current year is the default value (e.g., 2008). 1099 data can also be viewed for previous tax years.
- Select the Company Federal Tax ID. This field is required. The company’s tax ID(s) populates this drop-down list.
- Select the 1099 Type. This field is required. The possible values are 1099-MISC, 1099-INT, 1099-R, 1099-S, and 1099-G.
- Click Search to return 1099 data created for the values you selected.
Each page of this list contains 50 vendors. You can scroll through the current page and use the Previous Page, Next Page, or Page X of X options at the bottom of the list to navigate among the pages. The segment of the list being displayed and the total number of vendors returned by the search displays at the bottom left of the page.
The 1099 List by default is sorted by Recipient Name in ascending alphabetical order. The list can be sorted by clicking on the column header of the column you wish to use as the new primary sort criterion. To re-sort the list in descending order, click on the same column heading again.
Modifications to the sort order are retained only for the current page session. If you close the session or navigate to another page using one of the buttons at the bottom of the page, the page returns to the default sort order.
After 1099 Data is created, you can view the data created for a particular vendor and edit it as needed. Follow the steps below to modify the vendor information on the 1099 form:
- On the 1099 List page, click the Recipient Name (or Transferor name, for 1099-S) hyperlink for the vendor you wish to view.
- All of the information except the vendor’s name and tax ID can be edited as needed. Click Save when all changes are complete. The updates will be saved to the 1099 file.
If the vendor’s mailing address information has changed during the year, it can be modified before 1099’s are printed. Follow the steps below to modify the vendor mailing address on the 1099 form:
- On the 1099 List page, select and highlight the row for the vendor you need to change.
- Click Vendor Information.
- Update the contact information as needed. The Contact Name, first line of the Address, Zip Code, City, and State are all required.
- Click Save when all changes are complete. The updates are saved to the 1099 file.
If 1099 information on an invoice item needs to be modified, you can access the invoice from the 1099 List page. Follow the steps below to modify invoice item information:
- On the 1099 List page, select and highlight the row for the vendor with an invoice you need to update.
- Click Invoice Items.
- On the Vendor Invoice page, click the Expand (
 ) icon to expand the entry for the invoice you need to work with.
 - Click the Item Description hyperlink for the invoice item.
- Change the values in the 1099 Type drop-down list and/or Box 1099 field as needed.
- Click OK to save the changes.
- Return to the 1099 List page and click Create 1099 Data to update the information. The item amount is applied to the 1099 box and 1099 type you specified.
- Click the Recipient Name hyperlink and the invoice item amount displays in the box you specified.
- Repeat as needed for other invoice items for the vendor to populate the appropriate 1099 box fields on the screen with the amounts that should appear on the 1099 form.
After you update the invoice item information, a 1099 is created for the amounts you specified, but this person or company will not be flagged as a 1099 vendor or included in the vendor list.
If there are vendors who are not normally 1099 vendors but who need to receive a 1099, you can add them to the 1099 list. It is also possible to add someone to the 1099 list who is not normally a vendor. Follow the steps below to add a vendor to the 1099 List:
- On the 1099 List page, click New.
- The Validated check box is used with the 1099 Register, which can be run for all transactions, validated transactions only, or not validated transactions only. The report uses this check box to determine which 1099’s to include on the report.
- Select a name in the Vendor drop-down list. You can type the vendor number or part of the name to filter the available choices in the list. After you select the vendor, the name and address information from the vendor record populates the fields on this page.
- As needed, populate the Recipient Name, Doing Business As (DBA), Federal Tax ID or SSN, Address Line 1, and Zip Codefields. The Zip Code value populates the City and State fields. This information must be provided before the record can be saved.
- When you click Save, the non-1099 vendor becomes part of the 1099 List.
If a vendor is no longer a 1099 vendor, it can be deleted from the 1099 List. To do this, follow the steps below:
- On the 1099 List page, select and highlight the row for the vendor you want to delete from the 1099 List. Click Vendor Information.
- Go to the Miscellaneous page for the vendor.
- Select the <blank> values in the Default 1099 Type and 1099 Box fields.
- Click Save. The vendor is now no longer flagged as a 1099 vendor but is still a vendor in the system.
- Go back to the 1099 List page. Highlight the vendor and click Delete. The vendor has now been removed from the 1099 List.