Reporting Qualified Overtime for Calendar Year 2025
Introduction
Beginning with the 2025 tax year (meaning W-2s issued in early 2026), there will be new requirements for reporting qualified overtime due to the "One Big Beautiful Bill Act" (OBBBA). The IRS has designated 2025 as a transition period and will not penalize employers for failing to separately report the qualified overtime amount. However, employers are encouraged to provide the amount of "qualified overtime compensation" to employees in one of the following ways to help employees claim their deduction:
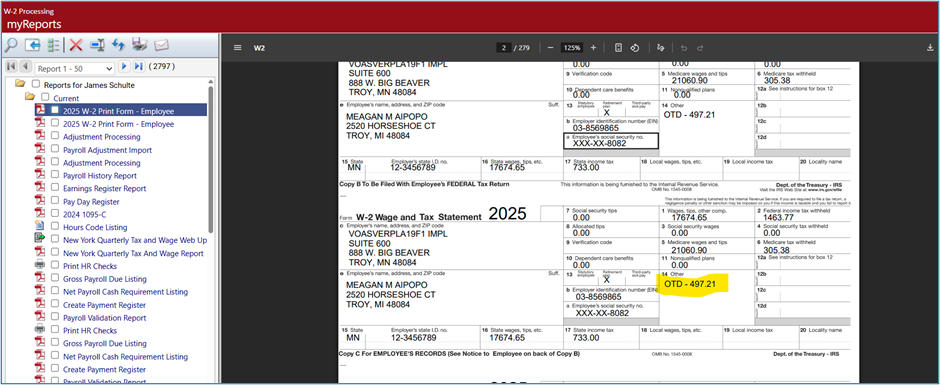
- In Box 14 of the Form W-2, using a descriptive label like "OTD" for “Overtime Deduction."
- On a separate statement furnished to the employee (e.g., an additional written statement or through an online portal).
This document will explain how to report qualified overtime using the most efficient methods included in the standard New World ERP software. Below are a series of instructions that will identify the setup required and the processes utilized to report the qualified overtime amounts on employee W-2s in box 14.
Overview
- Build an hours code that can be used to capture the amount of qualified overtime.
- Create an adjustment import file using employee number, hours code, date, and qualified overtime amount.
- Using the Adjustment Import process, import that file to update the employee with their qualified overtime amount.
- Set up a code for box 14 in the validation set entry page. (OTD – Overtime Deduction)
- Prior to processing the W-2s, on the W-2 setup page, configure box 14 to report all amounts from the Qualified Overtime Hours Code that was built previously.
Setup
Hours Code
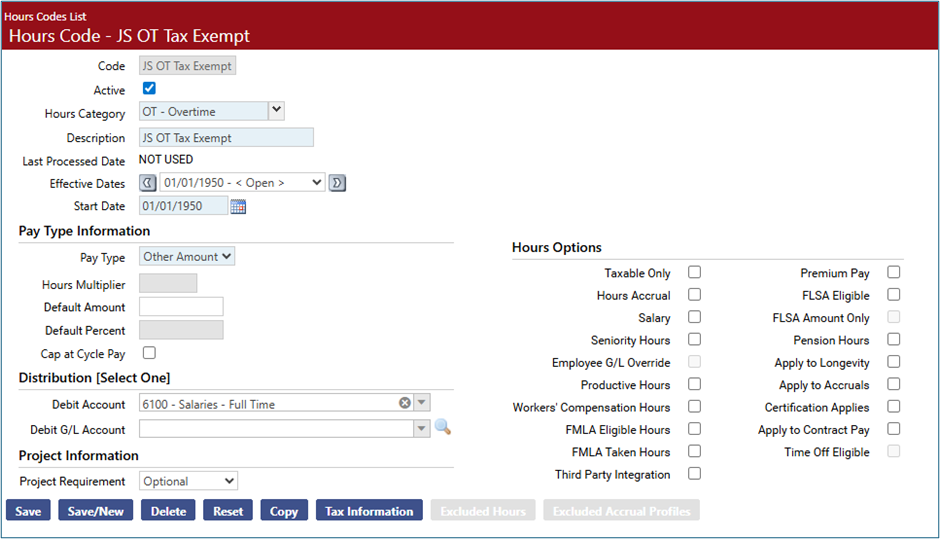
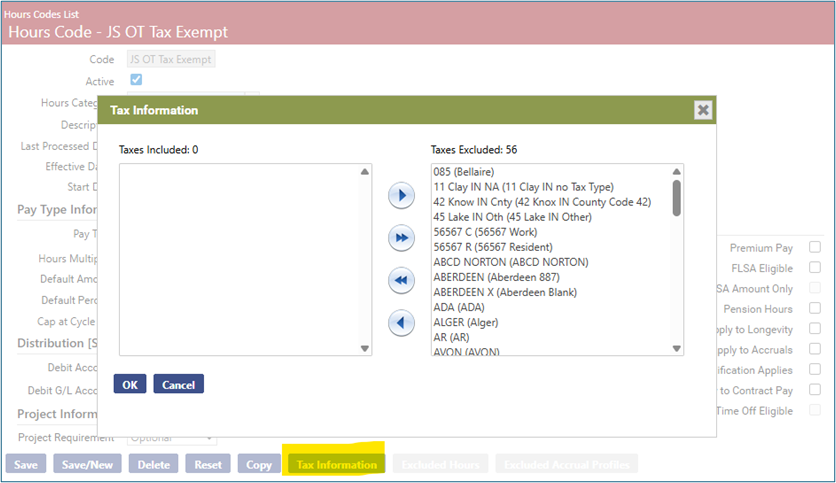
Build a new hours code that can be used to report on the qualified overtime amount for employees. Below is an hours code that is configured with a pay type of Other Amount and has Tax Information selected with all taxes excluded (similar setup to a reimbursement type hours code):
Validation Set
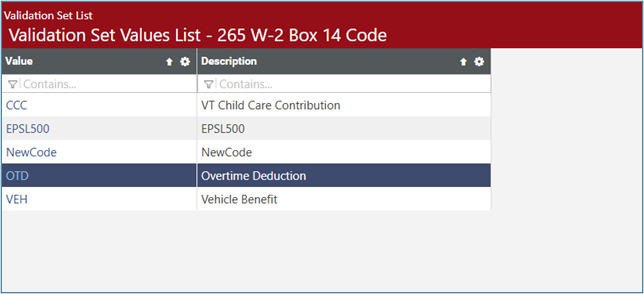
Go to Maintenance > new world ERP suite > System > Validation Sets > Validation set list. Find Validation Set 265 – W-2 Box 14 Code. Add a new code for box 14. The example below shows a code of OTD and a description of Overtime Deduction:
Adjustment Import
Import File Configuration
Under the Human Resources > Payroll Administrator Tasks menu is an option for Adjustment Processing. Adjustment Processing has a feature that will allow for a .csv file to be directly imported. The file layout specifications can be found in Help Central, but they have been included below:
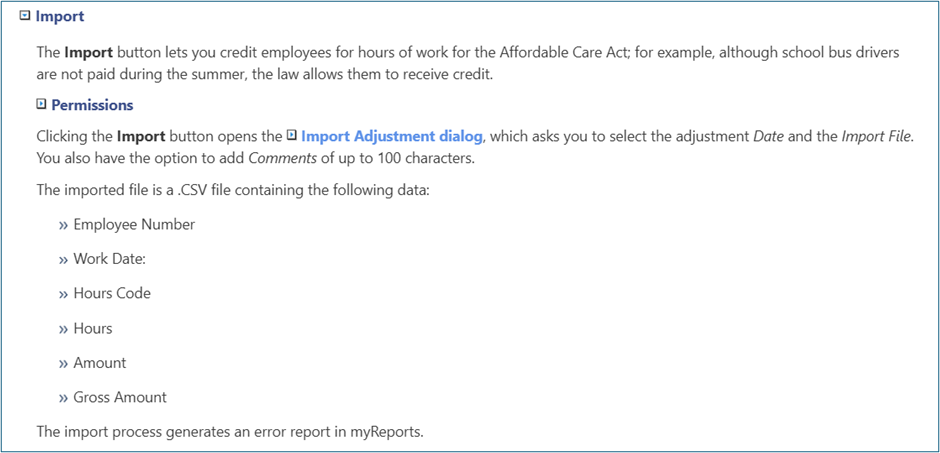
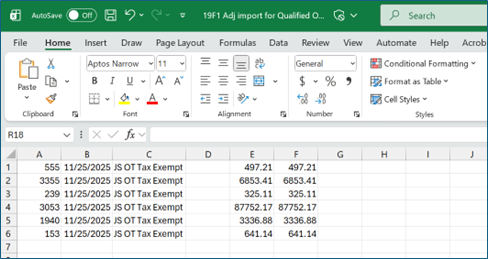
Create a simple import file with the employee number, date, hours code, amount, and gross amount, like the example below. Save the file with a .csv extension:
Import Processing
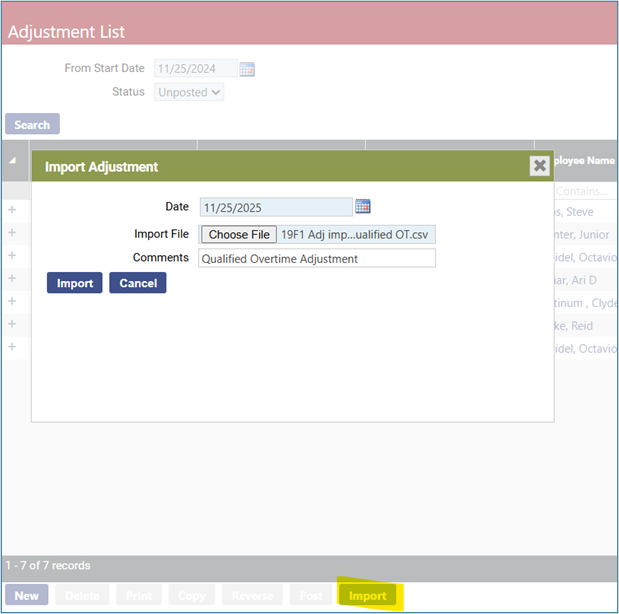
Select the import option at the bottom of the page to begin the Adjustment Import process. Enter a date for the import and select the file to be imported. Comments are optional:
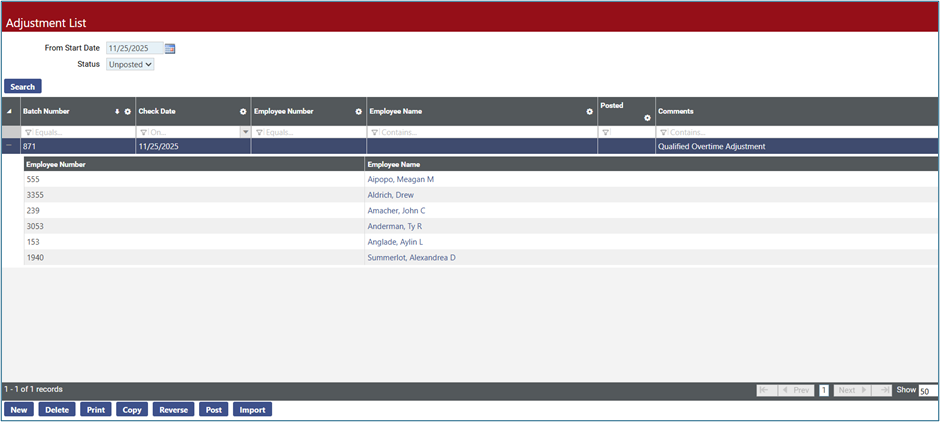
If the imported file has any errors or formatting issues, an error report will generate and be sent to my reports. Upon successful completion of the import, there will be an adjustment batch in the list that can be expanded to show the adjustment details:
Highlight the adjustment batch and select the Print button. This will generate an Adjustment Processing Report in myReports shown below. After review of the adjustment, highlight the adjustment batch and select the Post option.
Year End
Year-End Setup
Go to Human Resources > Year-End Processing > W-2 Processing. This is the W-2 Setup page. Select Box14 from the Box drop down menu. From the Box Code drop down, select the newly created code for qualified overtime (this example uses OTD-Overtime Deduction) Next, select the Hours Code tab to activate the available hours codes for selection and move the newly created hours code for qualified overtime into the jump box on the right. This example shows the hours code of JS OT Tax Exempt, built earlier:
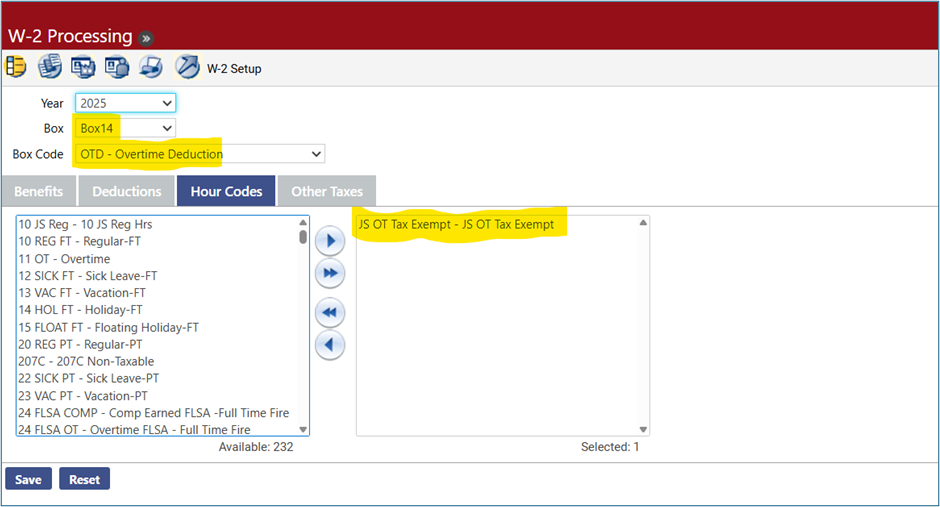
Click the Save button to save this configuration.
Year-End Processing
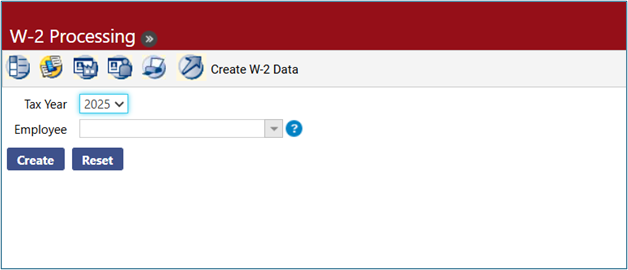
Within the Year End Processing menu, navigate to the next workflow icon, Create W-2 Data. Select the tax year and click the Create button to generate the W-2 data:
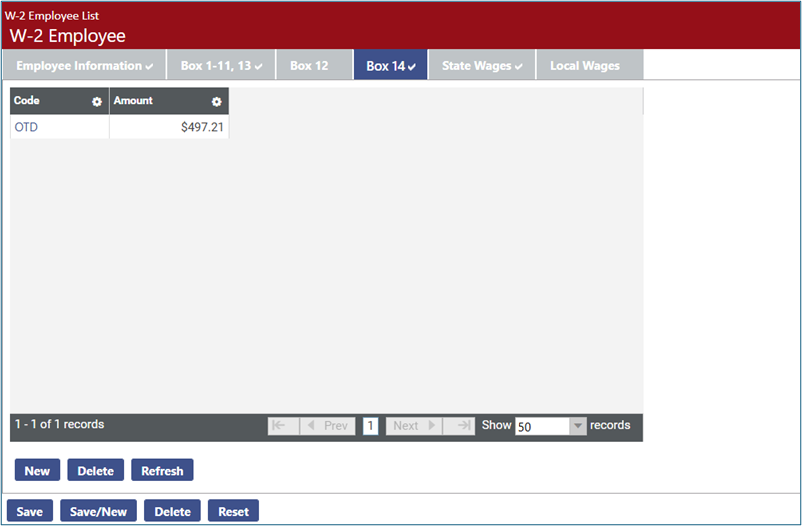
The W-2 Employee workflow icon will display the employee list of W-2s created. Click one of these employees and select the Box 14 tab to display the results of the qualified overtime that was imported via Adjustment Processing and mapped to Box 14 of the W-2 during the create W-2 process:
Printing the W-2s will result in the qualified overtime amount being displayed in Box 14 of the W-2 using the code that was built on validation set 262.