Automated Import
An automated import service exists to create import files. To save manual work, these files will be imported on an automated/scheduled basis rather than being initiated by a New World ERP user. Three types of files can be imported: Journals, Revenue Collections receipt batches, and Accounts Payable invoice batches.
The import, edit and audit reports are produced as SSRS reports and thus can be generated as part of the scheduled import and emailed to a user to notify them that an import occurred and whether it was successful.
Maintenance > New World ERP Suite > System > Import/Export > Import Type
The Import Type records for Journals, Receipts, and Account Payable invoice batches have import settings that must be defined for the scheduled service. The Import Type Entry page now contains a third workflow icon  , Import Settings, for the journal, Accounts Payable invoice batch, and receipt batch imports. When you select this icon, you will see a screen like the following:
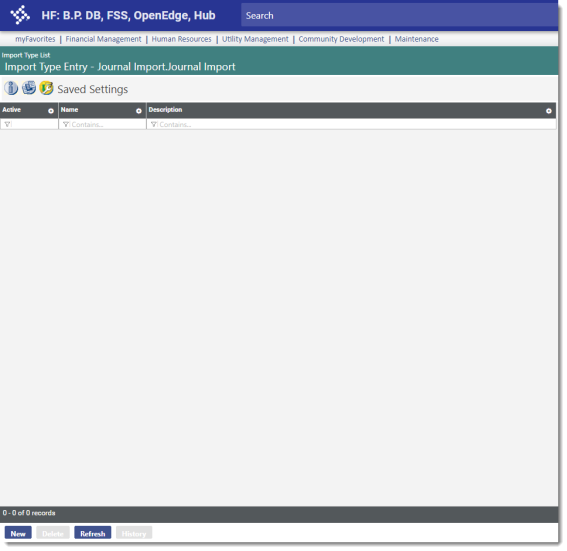
Clicking the New button or the link in the Name column will launch the import settings page:
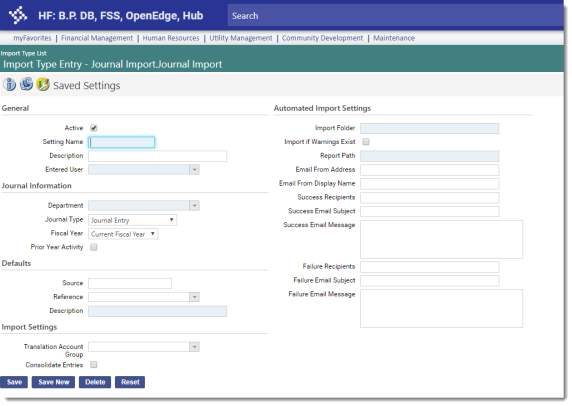
Most fields are common fields that will apply to each import type that uses the scheduled service. These are discussed below, and the fields unique to each import type are discussed separately after that.
- Select the Active check box if these import settings should be available for use. The system will not try to read the import file if this check box is not selected.
- Enter the Settings Name value. This will uniquely identify the import settings. This value is required.
- Enter a Description of the import settings. This value can provide more details about the name, if needed.
-
The Import Folder is required. Enter the folder where the imports should be placed (e.g., C:\NWERPImport\Journal). Logos.NET will monitor this folder and pull the import files it finds there.
Note: This path is relative to where the service resides on the application server, not the local machine. The service uses the import folder to access the import file; the application server is its local machine. A Universal Naming Convention (UNC) path may also be used, which provides a network path. The user running the Automated Import Service on the Application Server needs to have access to this path.
Note: If the organization has multiple imports (e.g., one each for current, prior, and next fiscal year for journals), each import should have its own Import Folder.
- The Import if Warnings Exist check box allows the organization to decide if an import that the system marks with a warning should still be imported. This check box is cleared by default, indicating that imports with warnings should not be imported.
-
The Report Path is required. Enter the path where the edit and audit listings (in PDF format) will be stored, as well as any other reports run at the end of the import (e.g., C:\NWERPImport\JournalReports).
Note: The Report Path value should be different from the Import Folder path. Reports should not be stored in the import folder.
- Enter the Email From Address value to show the email address from which the imports originated.
- Enter the Email From Display Name to show the name that should be associated with the import.
- If the import succeeds, enter the Success Email Recipients who should receive notification that it succeeded. Email addresses can be entered as a string with the addresses separated by a semicolon.
- If the import succeeds, enter the Success Email Subject line that should display on the email sent to the recipients.
- If the import succeeds, enter the Success Email Message that should be sent to the recipients. Following this custom text, the system will also include some information about the import that is specific to the type of import performed.
- If the import fails, enter the Failure Email Recipients who should receive notification that it failed. Email addresses can be entered as a string with the addresses separated by a semicolon.
- If the import fails, enter the Failure Email Subject line that should display on the email sent to the recipients.
- If the import fails, enter the Failure Email Message that should be sent to the recipients.
- Click Save to retain the import settings.
For journal imports, the Journal Information, Defaults, and Import Settings sections on the Saved Settings page contain the fields specific to this import type:
- Select the Department that is responsible for the source of the journal. This value is required; options are all departments to which the user has authority in the General Ledger - Journal Processing process in Process Manager.
- Select the Journal Type that will be imported using these settings. The options are Journal Entry, Budget Adjustment, Encumbrance Adjustment, and Reclassification Journal.
- Select the Fiscal Year to which the import settings will be applied. The options are Current, Previous, and Next; Current is the default value. The system uses the Default Fiscal Start Month setting in Maintenance > New World ERP Suite > System > Company Suite Settings > G/L Setup tab to determine whether the journal is for this year, the previous year, or the next year. This value is used to determine the next journal number to assign to the journal.
- If Prior Year Activity should be included in the import, select this check box. The system looks at the journal entry detail to determine if the Prior Year Activity check box is selected and should be included in the import.
- Enter the Source value that should be used as the default journal source to be applied to transactions as they are entered.
- Select the Reference that describes the source of the journal. The options are defined in Validation Set 356, Journal Reference. Users can define values applicable to their organization; examples include Property Tax System, Investments, and Debt Management.
- Enter the default Description that should be applied to transactions as they are entered.
- The Translation Account Group is used in situations where G/L information is being shared between two different accounting systems. A translation account would be set up on the G/L account for the account in the different system, so the information can be imported into New World ERP. The options are defined in Validation Set 266, Translation Account Group.
- Select the Consolidate Entries check box if journal entries should be consolidated when the journal import is performed.
For receipt batch imports, the Batch, Defaults, and Special Conditions sections on the Saved Settings page contain the fields specific to this import type:
- Select the Entered User. This value is required; it is the name of the user, usually a cashier, who entered the receipts into the system.
- Select the Department that is responsible for the source of the receipt batch. This value is required; options are all departments to which the user authority in the Revenue Collections - Revenue Entry process in Process Manager.
- Select the Collection Station that will be the default station for processing receipt batch imports. This value is required; the options are all the collection stations to which the user has been given permissions in User-Based Security.
- Select the Payment Code that will be the default code for processing receipt batch imports. This value is required; the options are all the payment codes to which the user has been given permissions in User-Based Security.
- Select the default Payment Type that should be used when receipt batches are imported. This value is required; the options are cash, check, charge, EFT, and Other.
- Select the Funds Pre-Deposited check box if funds for the transaction have been deposited. Transactions with pre-deposited funds do not appear on the Bank Deposit edit reports. This check box is cleared by default.
- In Override Cash Account, select the Cash (debit) G/L account that will override all transactions in the batch. This override is used primarily with pre-deposited funds where the bank account containing the deposited funds is associated with a cash account that is different from the bank account where funds normally are deposited.
- In Override Deposit Bank Account, select the deposit bank account that will override all transactions in the batch. This override is used primarily with pre-deposited funds where the bank account containing the deposited funds is different from the bank account where funds normally are deposited.
- The Translation Account Group is used in situations where G/L information is being shared between two different accounting systems. A translation account would be set up on the G/L account for the account in the different system, so the information can be imported into New World ERP. The options are defined in Validation Set 266, Translation Account Group.
- Click Save to retain the import settings.
For invoice batch imports, the Batch, Invoice Defaults, and Import Specifications sections on the Saved Settings page contain the fields specific to this import type:
- Select the Entered User. This value is required; it is the name of the user, usually a clerk, who entered the invoices into the system.
- Select the Department that is responsible for the source of the invoice batch. This value is required; options are all departments to which the user authority in the Accounts Payable - Invoice Entry process in Process Manager.
- Enter an Import Batch Description. This value is required; it may contain up to 64 char-acters.
- Select the Single Vendor Batch check box if each batch will contain invoices from only one vendor. This check box is cleared by default.
- If the Single Vendor Batch check box is selected, two additional required fields will be enabled:
- Select the Default Vendor to use for all invoice batches using this Import Folder. The default vendor may be overridden if necessary.
- Select the Remittance Address to use for this vendor. This value will default based on the vendor chosen.
- Select the default Paying Bank for the invoice batches. This field is required. The options are all banks to which the user has permissions.
- Select the default Item if invoice batches are routinely created for the same item.
- Enter a Description of the default item, if desired.
- Enter the default Amount of the batch, if invoice batches are routinely created for this amount.
- Enter or select a default G/L Account for the invoice batch, if the same account is routinely used.
- The Use Current Date as Received Date check box is selected by default. If the Require Invoice Received Date check box on Company FM Settings > Accounts Payable is selected, this check box will be selected and disabled. Otherwise, the received date is optional.
- The Translation Account Group is used in situations where G/L information is being shared between two different accounting systems. A translation account would be set up on the G/L account for the account in the different system, so the information can be imported into New World ERP. The options are defined in Validation Set 266, Translation Account Group.
- Select the rule to be used for Unknown Payees. The default value is Do Not Import Invoices; the other options are Create Temporary Payee and Create Permanent Vendor.
- Select the Create Manual Check Register check box if the organization issues checks from a third-party system but will track the G/L and check information through Logos.NET. In this situation, the system will treat the invoices as paid, and they will not go through Invoice Payment Processing. The check box is cleared by default.
- Click Save to retain the import settings.
File Processing
The Automated Import service processes only one file at a time in sequential order. If multiple imports are executed in succession, the system will not process them all simultaneously. Allow time for sequential processing of the files.